DISCLAIMER: There is argument for and against the value of altering the original bedding of a service rifle. Among service shooters, it is a hotly debated subject indeed! So tinkerer beware, proceed at your own peril (or fun, depending on how you look at it)!
Bedding a Lee-Enfield No4 is hardly new territory. What is novel (as far as I am aware) is the use of RTV (Room Temperature Vulcanizing) gasket silicone as the barrel bedding agent. I merged the idea from my dealings with RTV bedding lever gun forends (to obtain better consistency under match-like conditions, as can be found here).
RTV silicone “vulcanizes”, bonding with tremendous durability and tenacity. An RTV silicone bed is also slightly cushiony; the magic elixir that will not produce or allow significant stressing between the forend and the barrel (with changing environmentals). As a bonus, RTV silicone should also far outlast the old cork strip solution, which requires ongoing maintenance. I surmise, RTV silicone will offer the same, if not superior level of support, while still offering that bit of breathing room as the barrel and action heats.
Versus an older SMLE, the No4 is considerably easier to “accurize” because the barrel is almost free floating out of the grease. There is no SMLE-style nose cap to deal with. The only contact point along the barrel of a No4 should be a small wooden platform at the very tip of the forend, offering between 2-6lbs of upward pressure on an otherwise free-floated barrel. It goes without saying, the No4 also wears that rear mounted aperture sight, with the slightly heavier contour barrel; both desirable for competition. Nevertheless the principals applied here to the No4 could possibly be applied to an SMLE; at least that’s how I’d experiment with accurizing an SMLE!
PART 1: BEDDING THE ACTION
Firstly we need to understand how our action interfaces with the forend. Remove the action from the timber forend as normal:

Lots of old oil and mung that needs cleaning up. You can actually see how the action has bedded over the decades.
Spray the timber around the action area with WD40, then dust with talcum powder. Reassemble the action and trigger guard, and tighten up the king screw. Disassemble once more and observe how the action has imprinted into the talc dust:
In my example, you can see the distinct area immediately behind the king screw where the action has made contact. Moving rearward (besides the two small vertical faces known as the “draws”), there is little observable contact. On the upside, my draws look to have equal distribution from both recoil lugs; this is absolutely critical to accuracy. If your gun is not centering on the draws, stop here and address that issue first. Amending the draws is beyond the scope of this guide.
Ideally the action should bed down all along the length of the action as shown in the following diagram (shown in red):
In addition to where the action will sit, it is advisable to add a small bed, approximately 1″ wide for the reinforce point to sit. This area can be masked using painter’s tape.
Clean as much oil and grime as you can from the timber. Use acetone, a toothbrush and a heat gun. After the targeted area has been thoroughly cleaned and dried, roughen it up with a small file to give the epoxy somewhere to “grab”:
Mask any areas of the forend you don’t want the epoxy to bleed. Thoroughly degrease and apply release agent per instructions to any areas of the action and knox form that are likely to make contact with the epoxy. Fill problematic holes with air-drying modeling clay.
Mix the Acraglas Gel per instructions, then apply to the targeted areas of the timber. Reassemble the action and trigger guard and tighten the king screw. Let the epoxy harden for 24 hours. Remove the action from the forend, using a piece of timber and hammer to gently tap off any stuck forend:
Cleanup the bulging epoxy that has extruded to the sides of the bed; I do this carefully using a Dremel tool. Cut away the areas of the reinforce point bed hanging over the masking tape, leaving just the little pad for the reinforce point to rest. The action should now mate perfectly with the timber
PART 2: RTV CENTER BEDDING
Two popular bedding methods for the No4 are referred to as “central” bedding and “center” bedding.
“Central” bedding defines laying a stabilizing bed on the second platform, after the reinforce point, nearest to the central barrel-band/sling attachment.
“Center” bedding is similar, but is done on the first platform. Center bedding yields possibly the best accuracy out of the two styles, as it leaves the longest possible length of free-floating barrel beyond the bed. The only caveat of center bedding is the potential for droop / forend contact under recoil. Center bedding is probably better suited to a slightly heavier barrel than the earlier SMLEs.
Personally, I went the “center” bedding method, after all, it will be possible to dremel away and the bedding style down the track. Let’s just see how a large sample of my scores pan out.
There are two well known barrel bedding materials; the modern epoxy bed, and more flexible and traditional cork-strips method. This is where I deviate, opting for a third option, in the form of RTV gasket silicone (commercially known in Australia as “Permatex Ultra Black”). NOTE: You must not use common acetic-cure silicone as it will badly rust your barrel. I see an RTV bed as more comparable to the cork, yet much more concise and permanent.
Again, thoroughly clean and roughen the timber on the targeted platform. Meanwhile mark and mask your barrel in the appropriate locations. Degrease and apply release agent to the barrel around the circumference. Mask adjacent areas of timber with painter’s tape on the forend to protect from any extrusion. Lay down a thick consistent bead of RTV silicone onto the targeted timber platform:
Reassemble the barreled action and trigger guard and tighten the king screw. The silicone should slightly extrude out either side of the barrel as the barrel beds down as shown:
Wait 48 hours for the silicone to dry. Carefully cut away the extruded bead slightly lower than flush to break any mechanical lock. Clean up any mess with a scalpel leaving something like this:
Now, do the exact same thing all over again, only this time for the top timber, above the same platform. Before reassembly, build up a few layers of masking tape between the forend and top wood on the flats (where the two timber meet). The idea being, that once dried (and the tape removed), when the top and bottom wood is reassembled, the RTV should clamp down tightly around the barrel, providing support and rigidity.
PART 3: FREE FLOATING THE FOREND
Part 3 is relatively straight forward; we just need to relieve the timber swell at the tip of the forend and along the channel such that the barrel is completely free floating past our RTV bed. A playing card should slide easily under the entire length all the way back to the RTV bed. This can be achieved by incrementally applying machinist’s blue to the underside of the barrel, but I just use matte red lipstick as a cheap and convenient alternative. Again, the Dremel can greatly speed up this step with care! Keep removing material until the barrel flex up/down/left/right a couple of millimetres once reassembled; the last thing we want is for the barrel to badly whip against the forend under recoil:
PART 4: THE TRIGGER GUARD AND KING SCREW
We must analyse how the guard is interacting with the king screw and the timber forend. Of all the accurizations, the relationship between the trigger guard, king screw and the forend is possibly the most critical, warranting much investigation and experimentation. It is also common to bed the trigger guard using a small amount of epoxy. Only the front third of the plate needs doing. Nothing remarkable here.
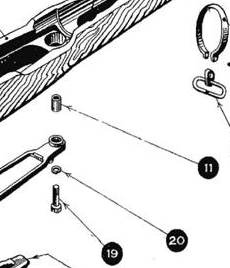
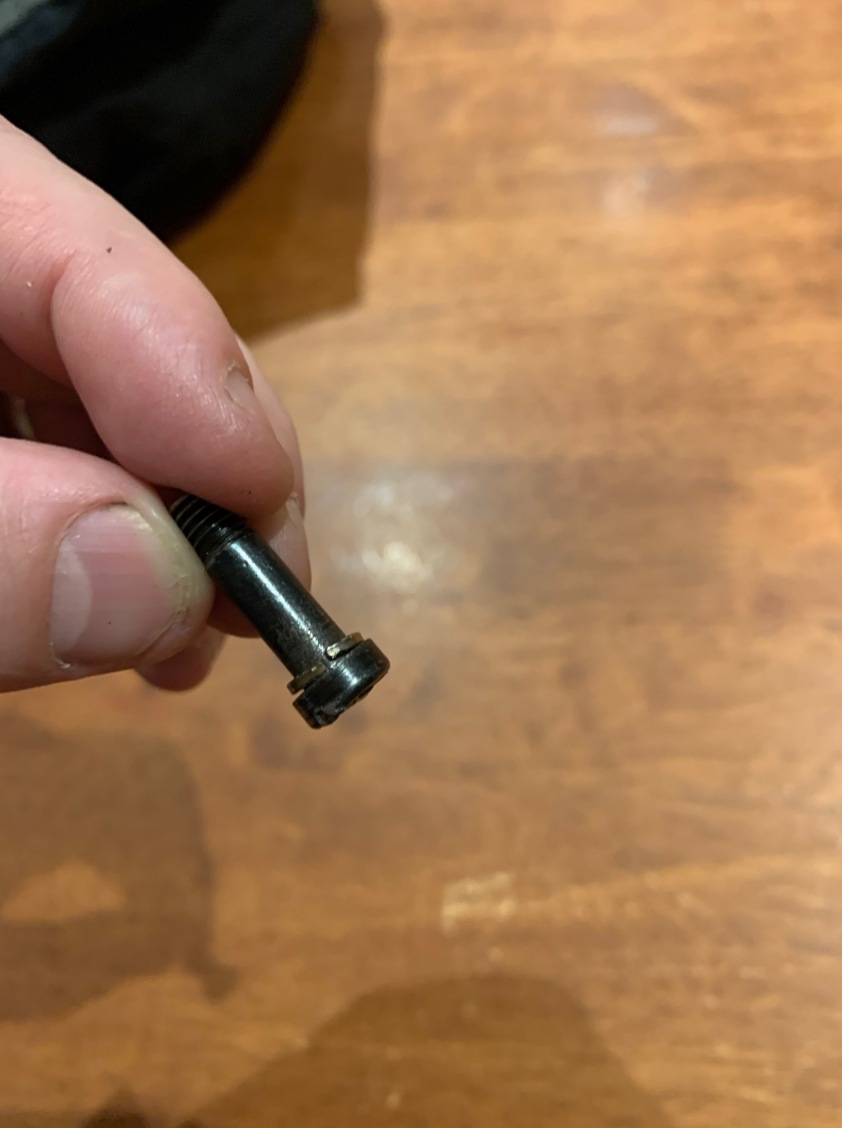
Over time the timber will dry out (without the constant application of boiled linseed oil). There’s a good chance your timber has shrunk away from the trigger guard. Therefore we must consider the king screw length, the king screw washer and the king screw bushing length. The three parts in question are shown in the following diagram:

11) king screw bushing 19) king screw 20) king screw washer
A good trick for measuring depths with and without these components is to unscrew the king screw and count the turns until the thread makes its first “jump”; resulting in an audible click. It was around 6 turns for me, depending on the presence of the washer and bushing.
The king screw should never bottom out in its hole; the king screw washer usually prevents this (20).

Make sure a washer is present to prevent the king screw from bottoming out in its hole.
The king screw bushing should not tightly bind between the trigger guard and the action (as was the case with my rifle). This can happen with shrunken wood.
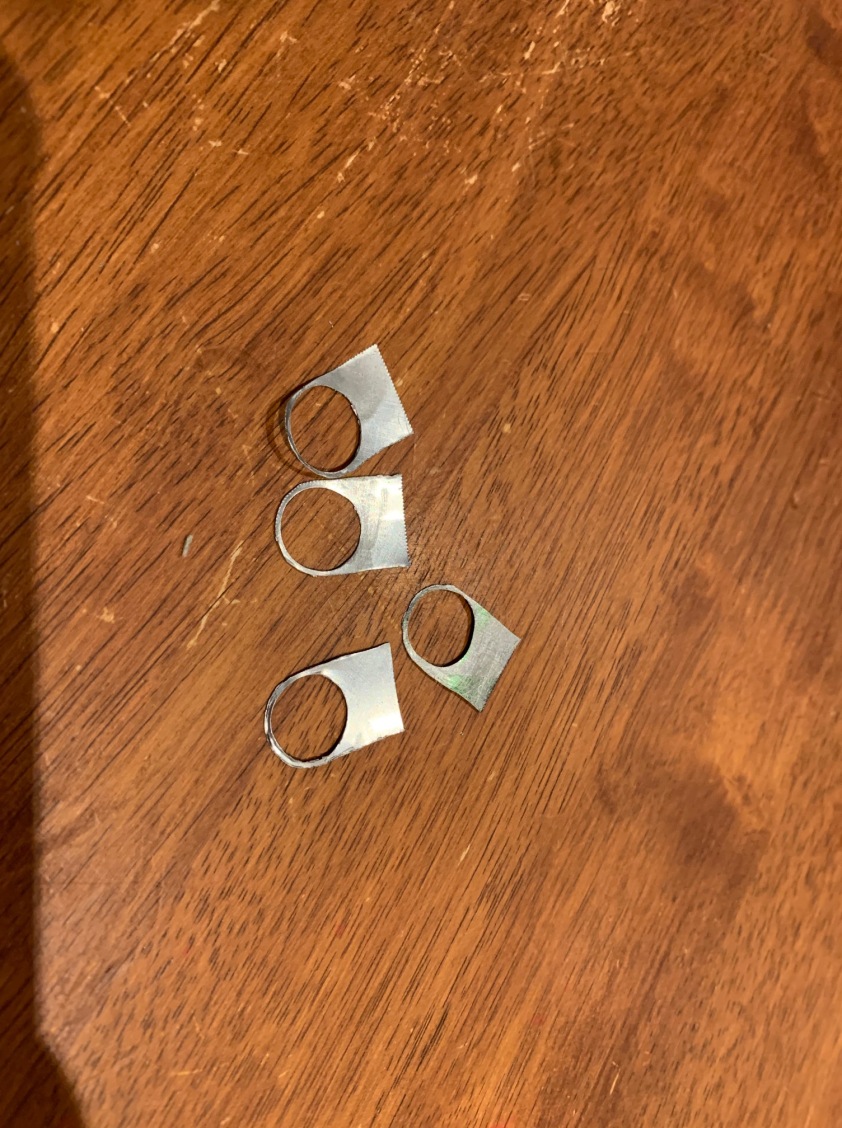
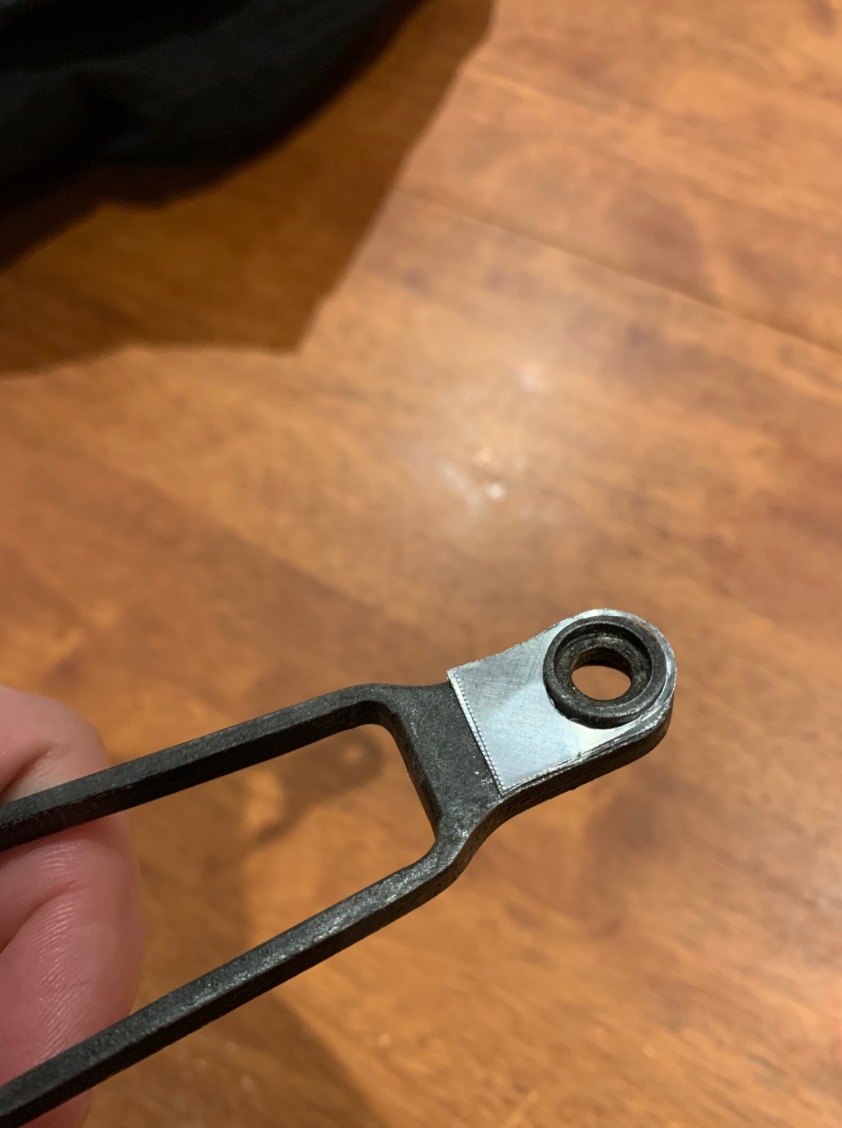
Shim the trigger guard until the king screw bushing is not binding, resulting on the clamping force instead being uniformly distributed onto the timber (via the shim). This was actually a technique used on the L42 sniper, and be done at home be aluminium can as I did:

Mine took four pop-can shims to prevent the bushing from binding. A single, thicker, steel shim would is even better.

Before cutting, trace the pop can with the guard for a precise fit
CONCLUSION
A quick visit to the local range yielded an encouraging result. Here’s 10 x 174gr SMKs over a full case of AR2209 (H4350), shot in under 2 minutes, with sling tension and a bag under my stabilizing hand. I used the factory front blade sight with an original No4 Mk1 micrometer sight, so shooter error is likely:


