RTV Silicone Bedding a Lee-Enfield No4

DISCLAIMER: There is argument for and against the value of altering the original bedding of a service rifle. Among service shooters, it is a hotly debated subject indeed! So tinkerer beware, proceed at your own peril (or fun, depending on how you look at it)!

Bedding a Lee-Enfield No4 is hardly new territory. What is novel (as far as I am aware) is the use of RTV (Room Temperature Vulcanizing) gasket silicone as the barrel bedding agent. I merged the idea from my dealings with RTV bedding lever gun forends (to obtain better consistency under match-like conditions, as can be found here).

RTV silicone “vulcanizes”, bonding with tremendous durability and tenacity. An RTV silicone bed is also slightly cushiony; the magic elixir that will not produce or allow significant stressing between the forend and the barrel (with changing environmentals). As a bonus, RTV silicone should also far outlast the old cork strip solution, which requires ongoing maintenance. I surmise, RTV silicone will offer the same, if not superior level of support, while still offering that bit of breathing room as the barrel and action heats.

Versus an older SMLE, the No4 is considerably easier to “accurize” because the barrel is almost free floating out of the grease. There is no SMLE-style nose cap to deal with. The only contact point along the barrel of a No4 should be a small wooden platform at the very tip of the forend, offering between 2-6lbs of upward pressure on an otherwise free-floated barrel. It goes without saying, the No4 also wears that rear mounted aperture sight, with the slightly heavier contour barrel; both desirable for competition. Nevertheless the principals applied here to the No4 could possibly be applied to an SMLE; at least that’s how I’d experiment with accurizing an SMLE!

Red areas were how my particular No4 originally bedded. The action bedding could be improved.

PART 1: BEDDING THE ACTION

Firstly we need to understand how our action interfaces with the forend. Remove the action from the timber forend as normal:

Lots of old oil and mung that needs cleaning up. You can actually see how the action has bedded over the decades.

Spray the timber around the action area with WD40, then dust with talcum powder. Reassemble the action and trigger guard, and tighten up the king screw. Disassemble once more and observe how the action has imprinted into the talc dust:

Dust then reassemble to see the imprint.

In my example, you can see the distinct area immediately behind the king screw where the action has made contact. Moving rearward (besides the two small vertical faces known as the “draws”), there is little observable contact. On the upside, my draws look to have equal distribution from both recoil lugs; this is absolutely critical to accuracy. If your gun is not centering on the draws, stop here and address that issue first. Amending the draws is beyond the scope of this guide.

Ideally the action should bed down all along the length of the action as shown in the following diagram (shown in red):

And here is the goal; bed the action. RTV bed the barrel. Free float the front of the barrel.

In addition to where the action will sit, it is advisable to add a small bed, approximately 1″ wide for the reinforce point to sit. This area can be masked using painter’s tape.

Clean as much oil and grime as you can from the timber. Use acetone, a toothbrush and a heat gun. After the targeted area has been thoroughly cleaned and dried, roughen it up with a small file to give the epoxy somewhere to “grab”:

Mask any areas of the forend you don’t want the epoxy to bleed. Thoroughly degrease and apply release agent per instructions to any areas of the action and knox form that are likely to make contact with the epoxy. Fill problematic holes with air-drying modeling clay.

Mix the Acraglas Gel per instructions, then apply to the targeted areas of the timber. Reassemble the action and trigger guard and tighten the king screw. Let the epoxy harden for 24 hours. Remove the action from the forend, using a piece of timber and hammer to gently tap off any stuck forend:

Immediatley after “cracking” the bedded forend off

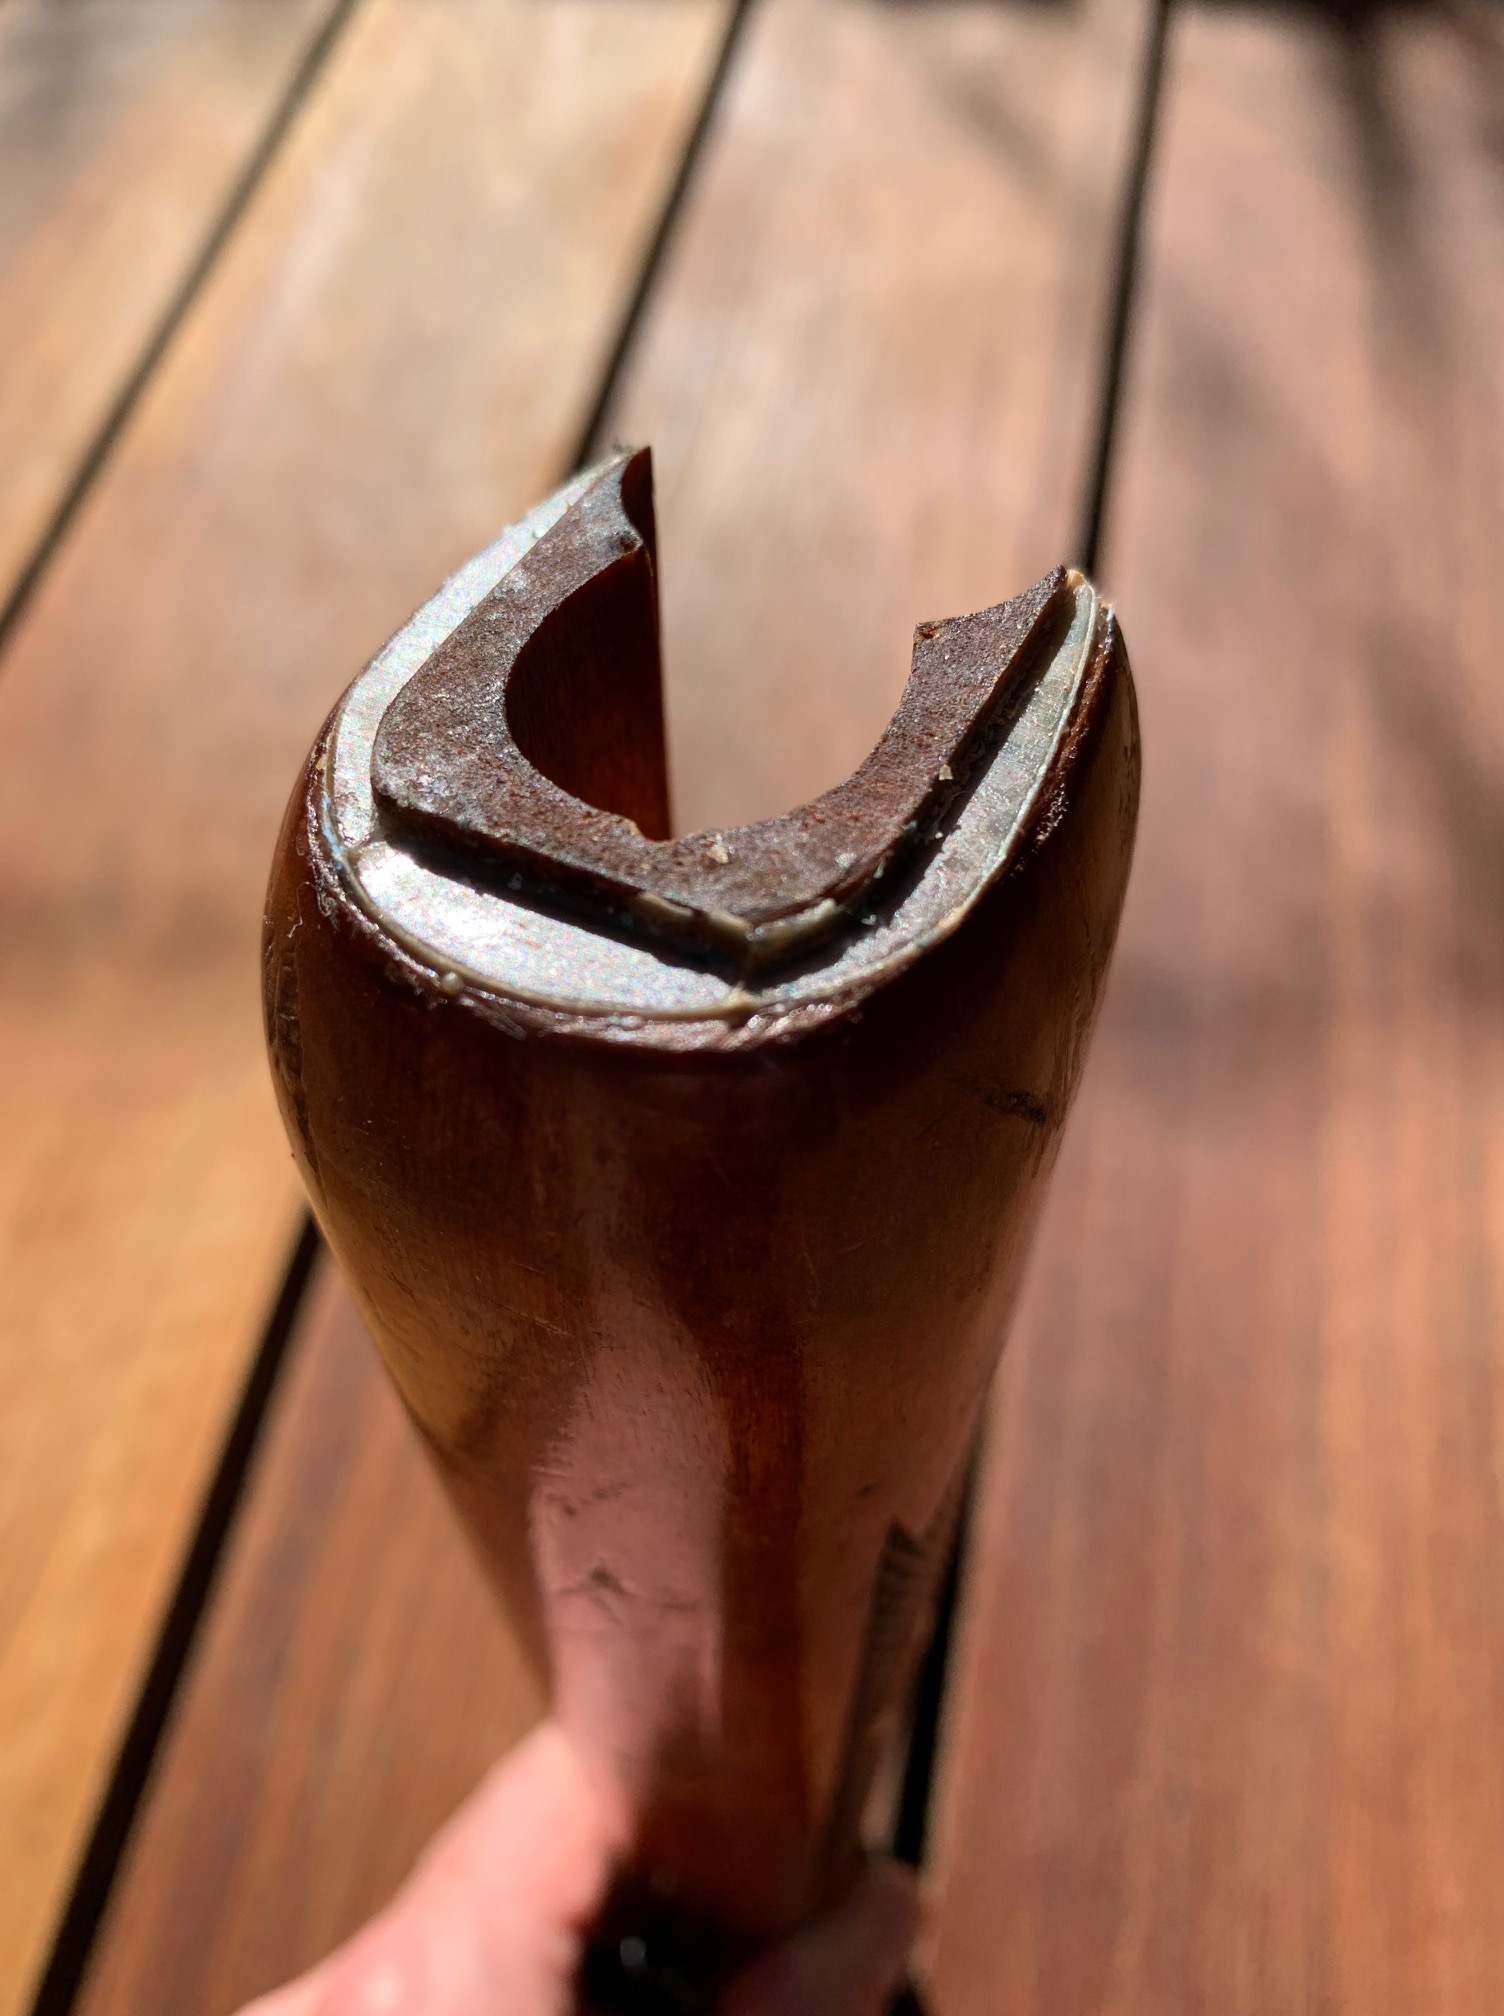
Cleanup the bulging epoxy that has extruded to the sides of the bed; I do this carefully using a Dremel tool. Cut away the areas of the reinforce point bed hanging over the masking tape, leaving just the little pad for the reinforce point to rest. The action should now mate perfectly with the timber

Cleaned up; all the knobbly bits dremelled away

PART 2: RTV CENTER BEDDING

Two popular bedding methods for the No4 are referred to as “central” bedding and “center” bedding.

“Central” bedding defines laying a stabilizing bed on the second platform, after the reinforce point, nearest to the central barrel-band/sling attachment.

“Center” bedding is similar, but is done on the first platform. Center bedding yields possibly the best accuracy out of the two styles, as it leaves the longest possible length of free-floating barrel beyond the bed. The only caveat of center bedding is the potential for droop / forend contact under recoil. Center bedding is probably better suited to a slightly heavier barrel than the earlier SMLEs.

Personally, I went the “center” bedding method, after all, it will be possible to dremel away and the bedding style down the track. Let’s just see how a large sample of my scores pan out.

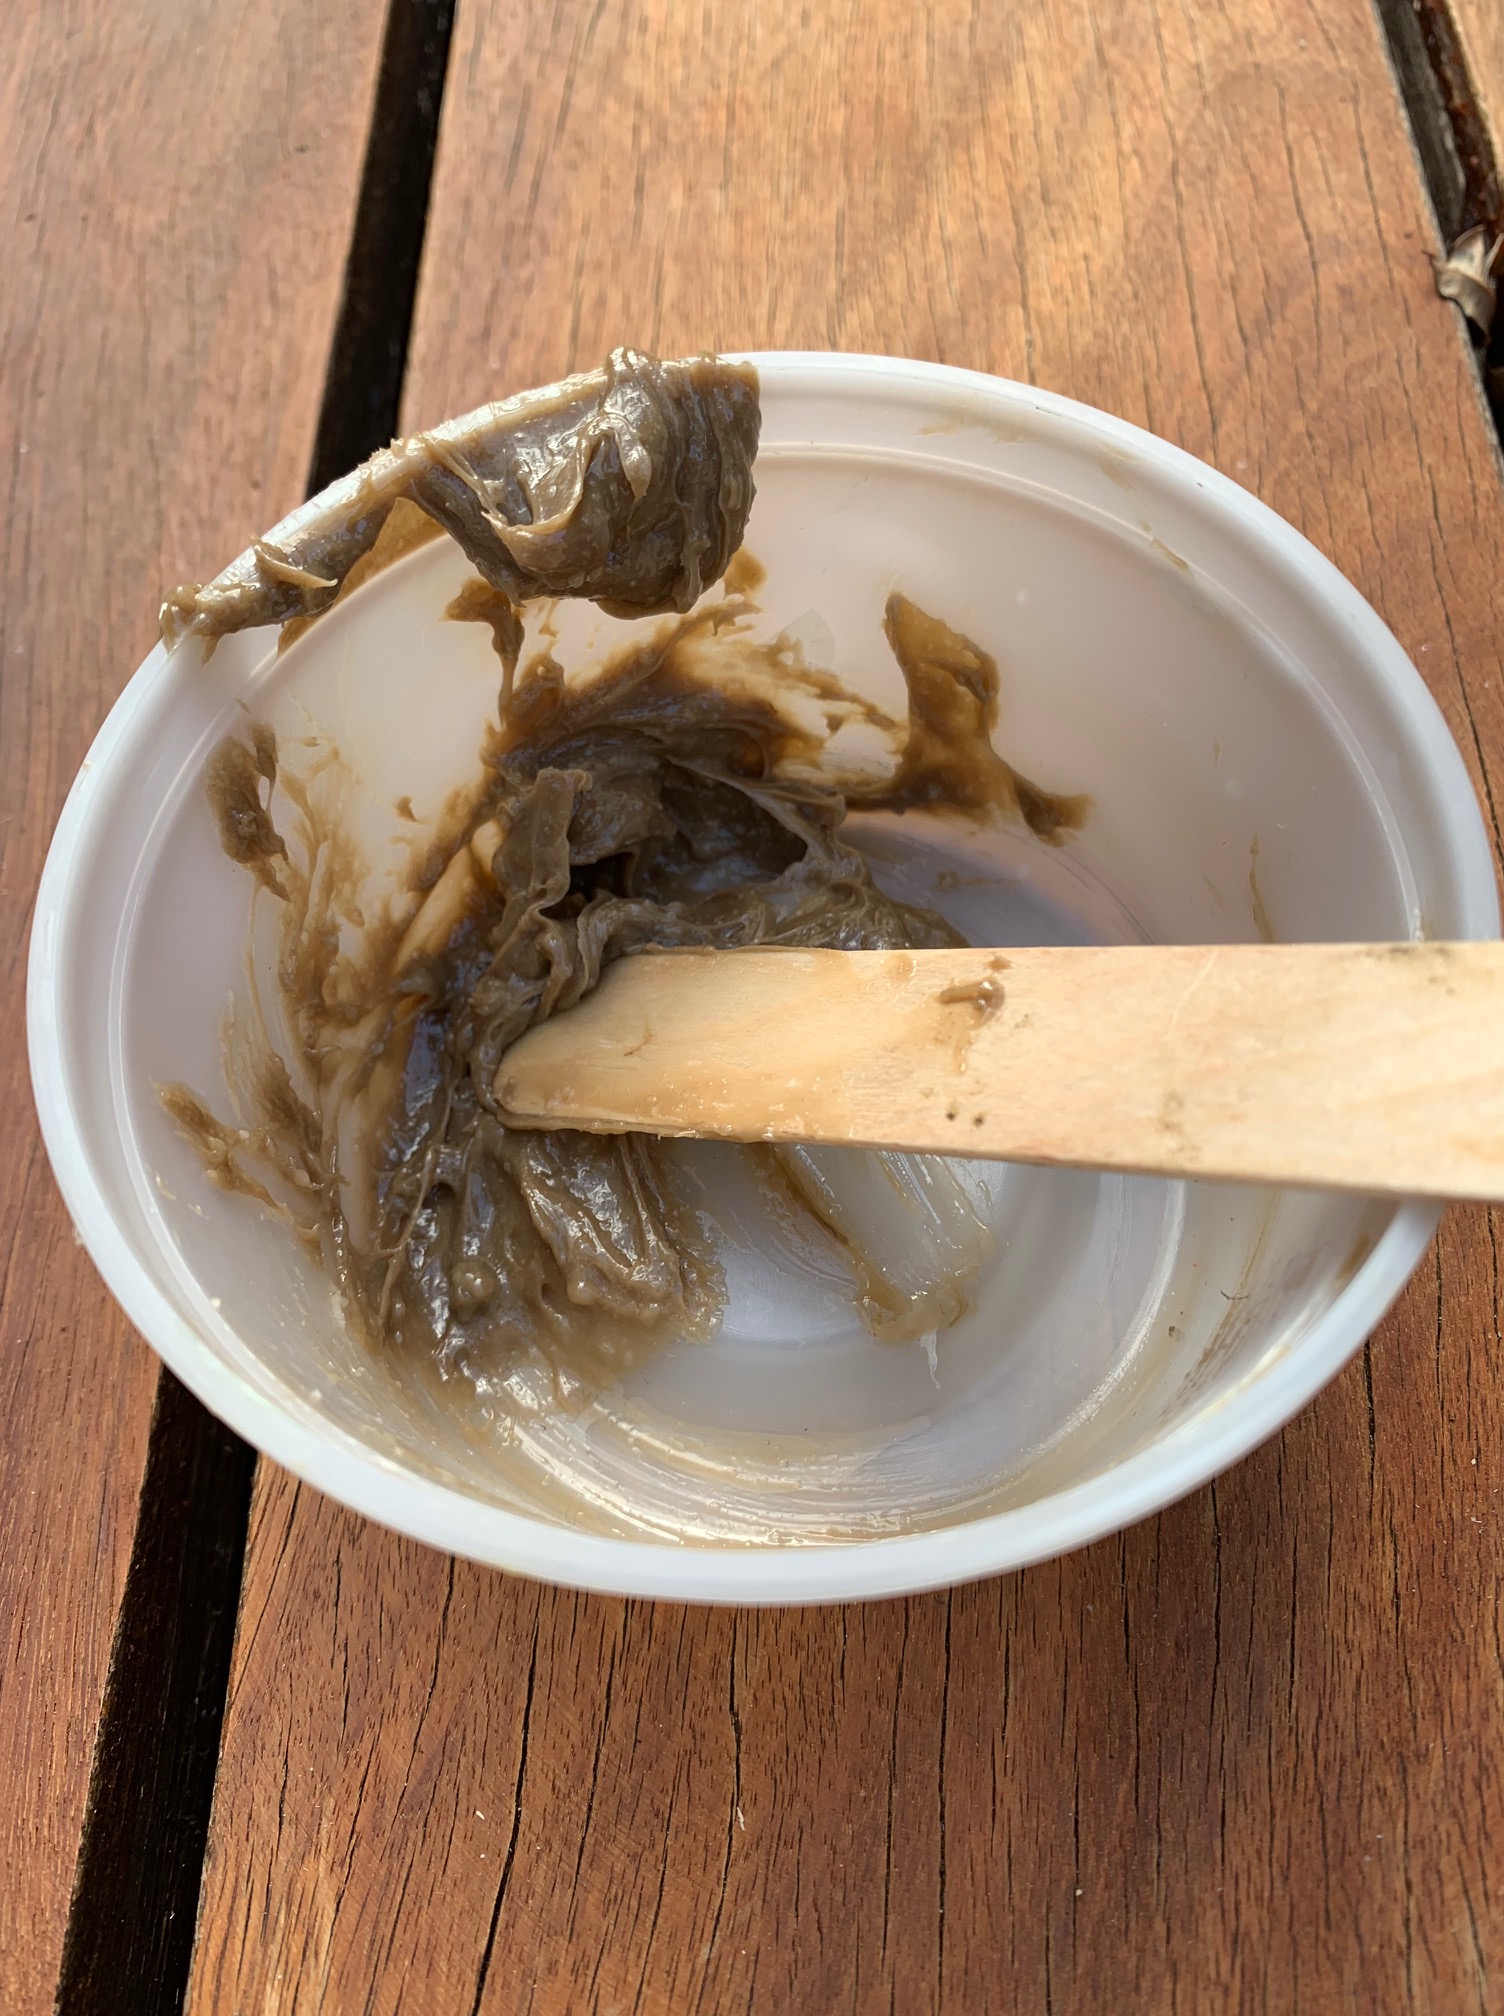
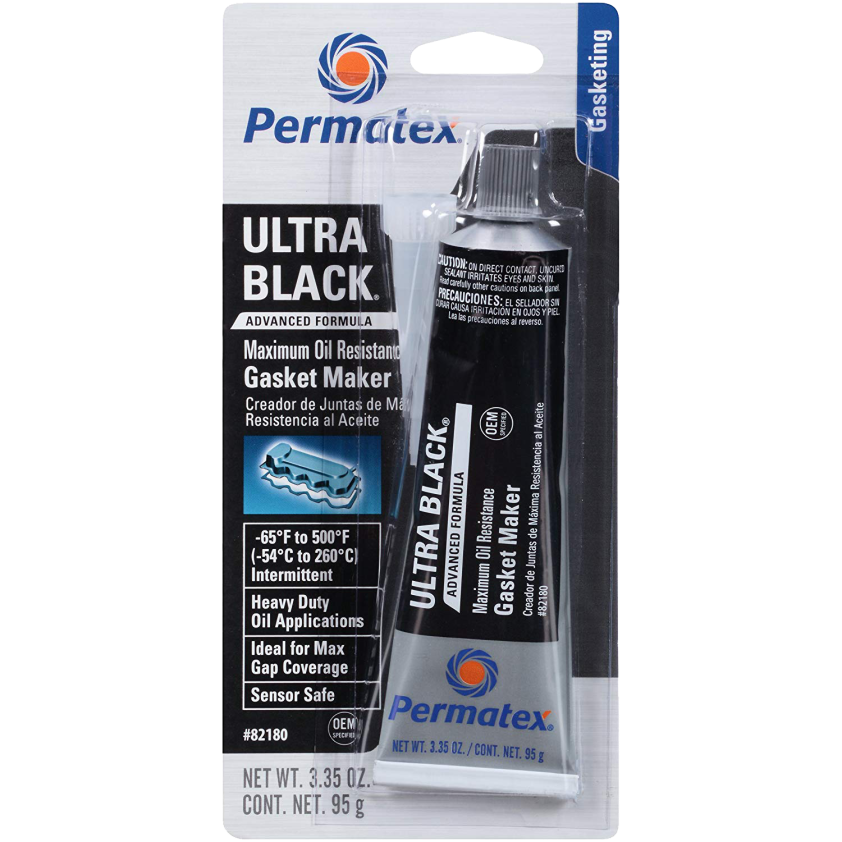
There are two well known barrel bedding materials; the modern epoxy bed, and more flexible and traditional cork-strips method. This is where I deviate, opting for a third option, in the form of RTV gasket silicone (commercially known in Australia as “Permatex Ultra Black”). NOTE: You must not use common acetic-cure silicone as it will badly rust your barrel. I see an RTV bed as more comparable to the cork, yet much more concise and permanent.

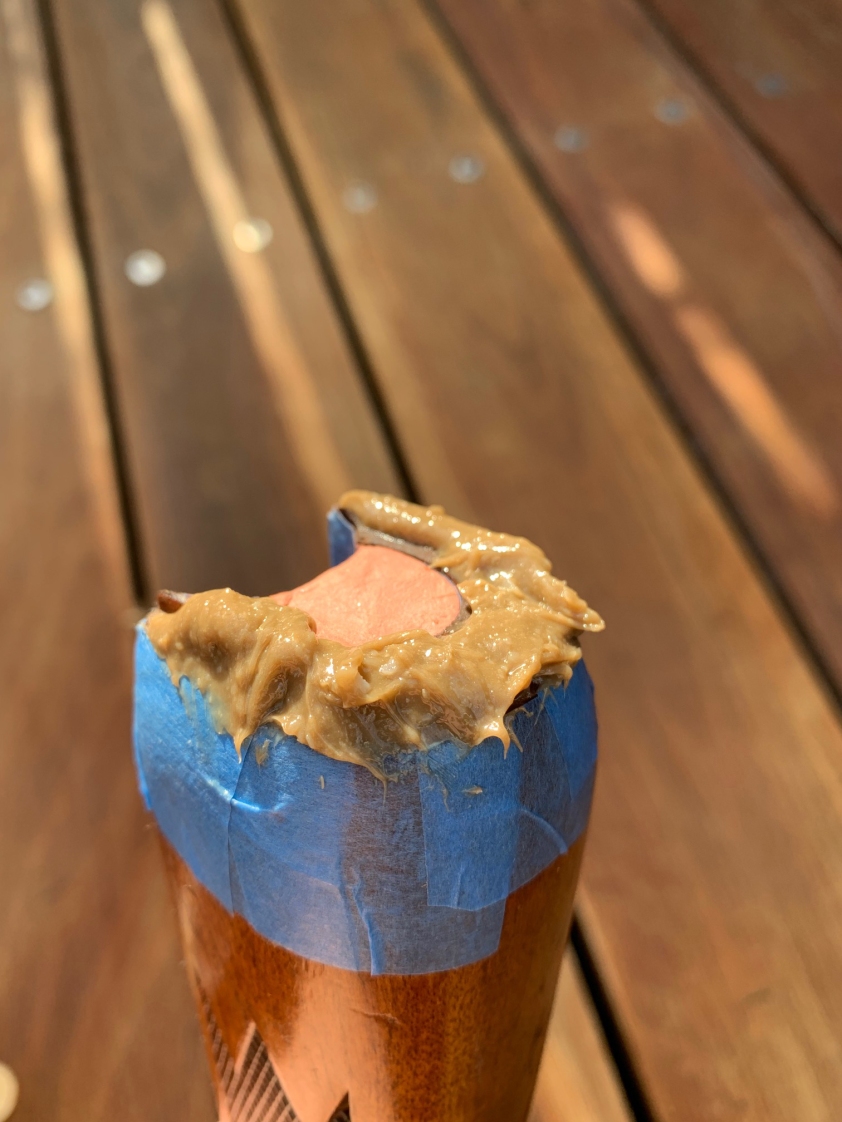
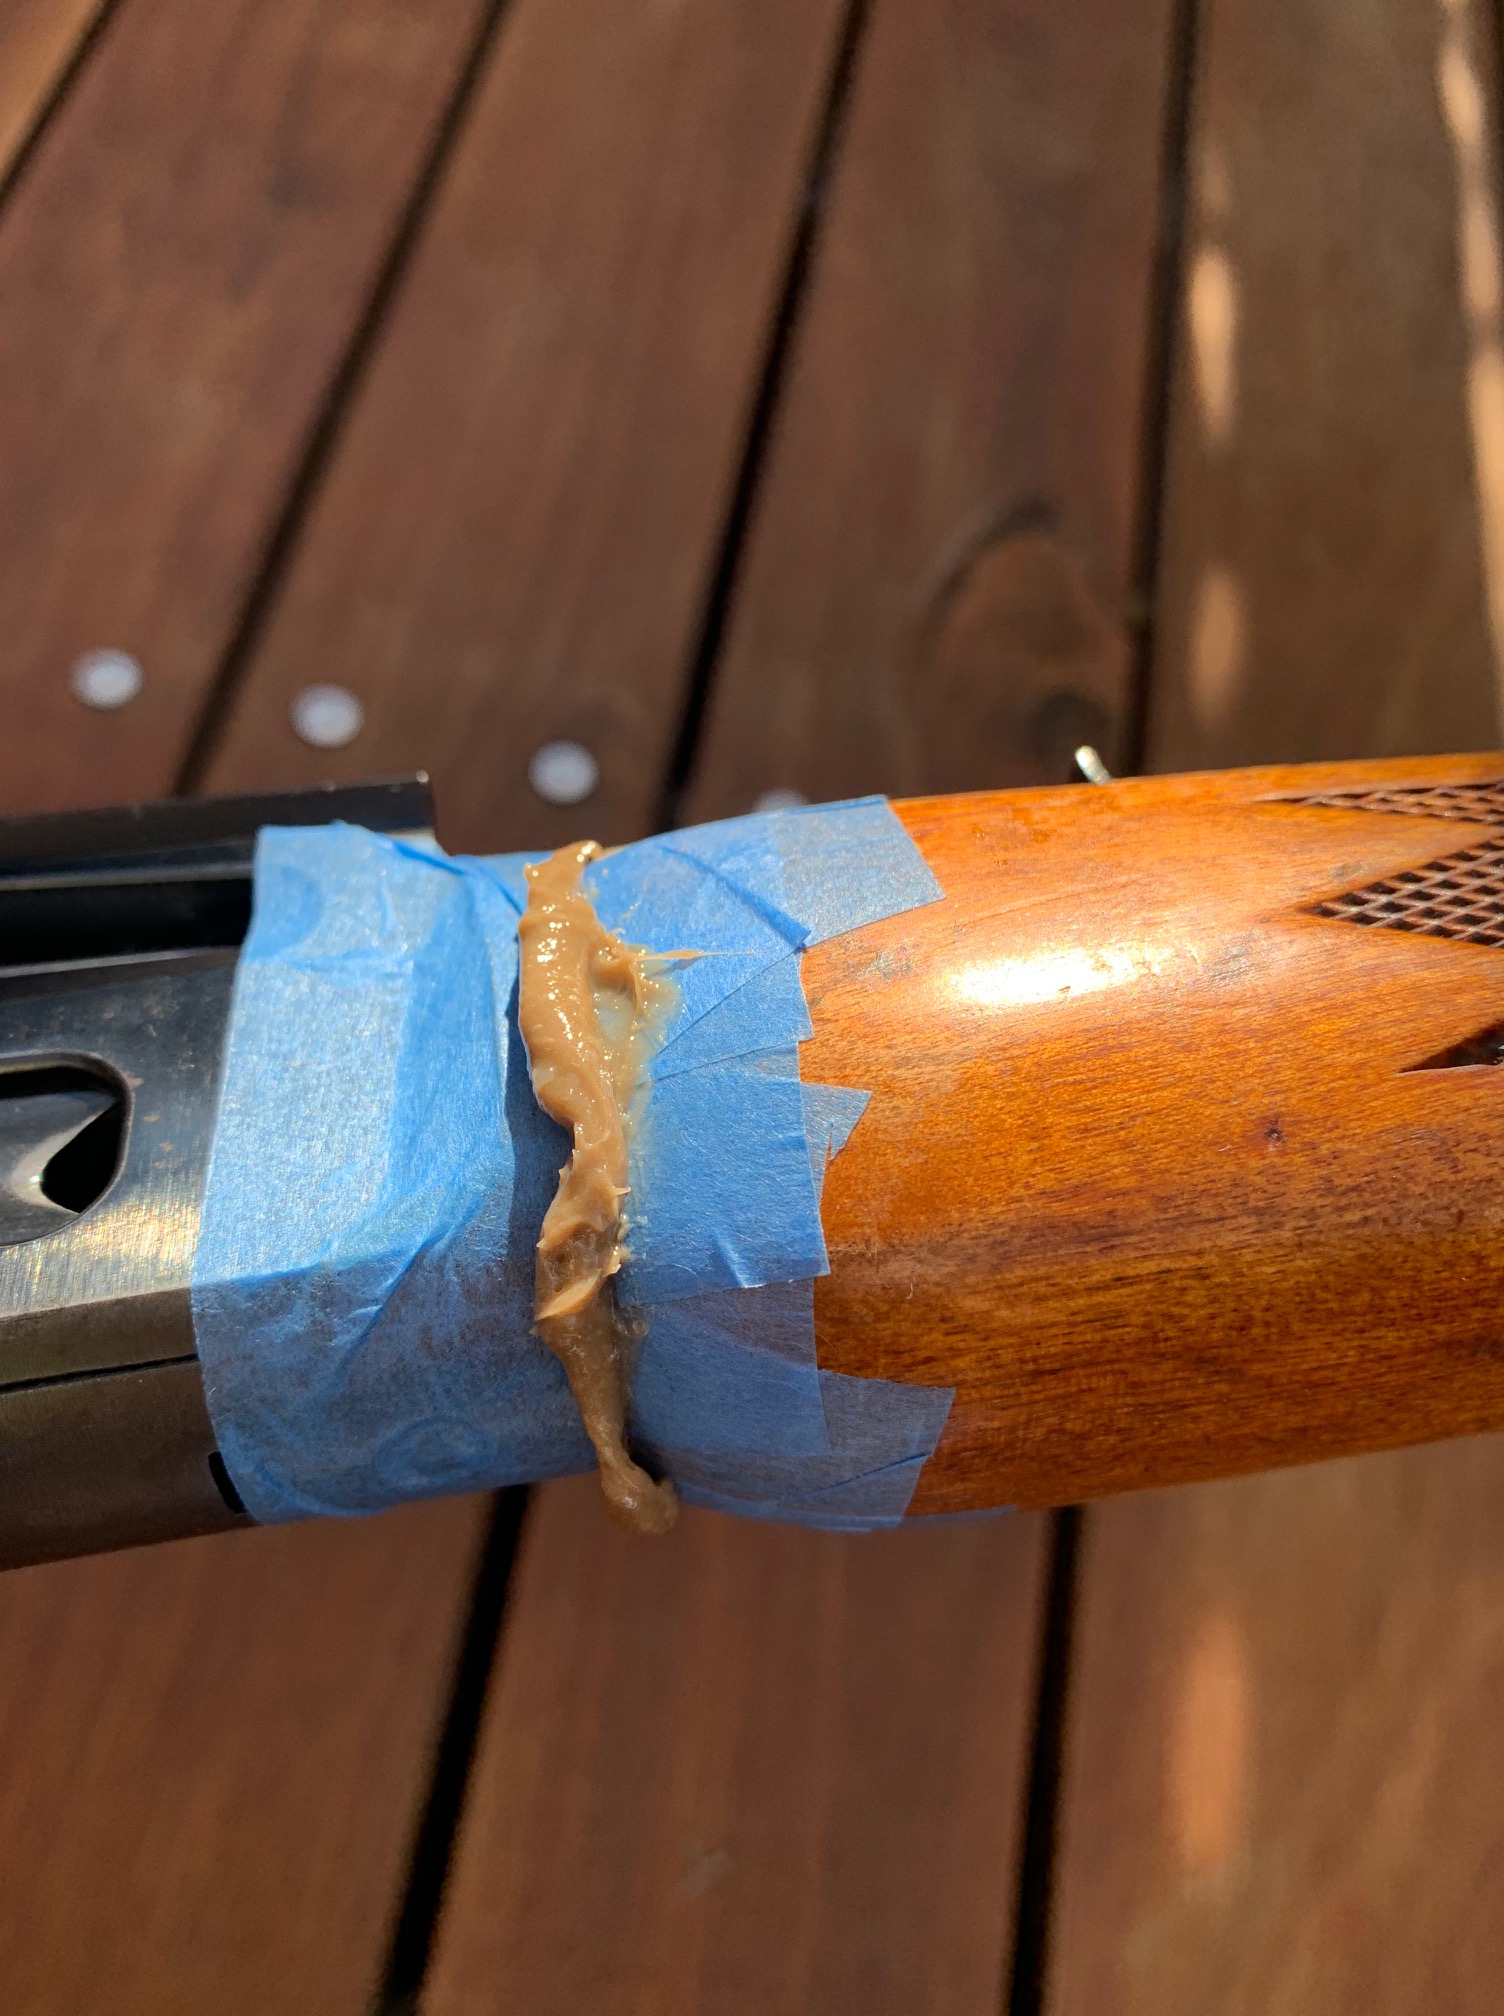
Again, thoroughly clean and roughen the timber on the targeted platform. Meanwhile mark and mask your barrel in the appropriate locations. Degrease and apply release agent to the barrel around the circumference. Mask adjacent areas of timber with painter’s tape on the forend to protect from any extrusion. Lay down a thick consistent bead of RTV silicone onto the targeted timber platform:

A liberal bed of RTC silicone ready for reassembly

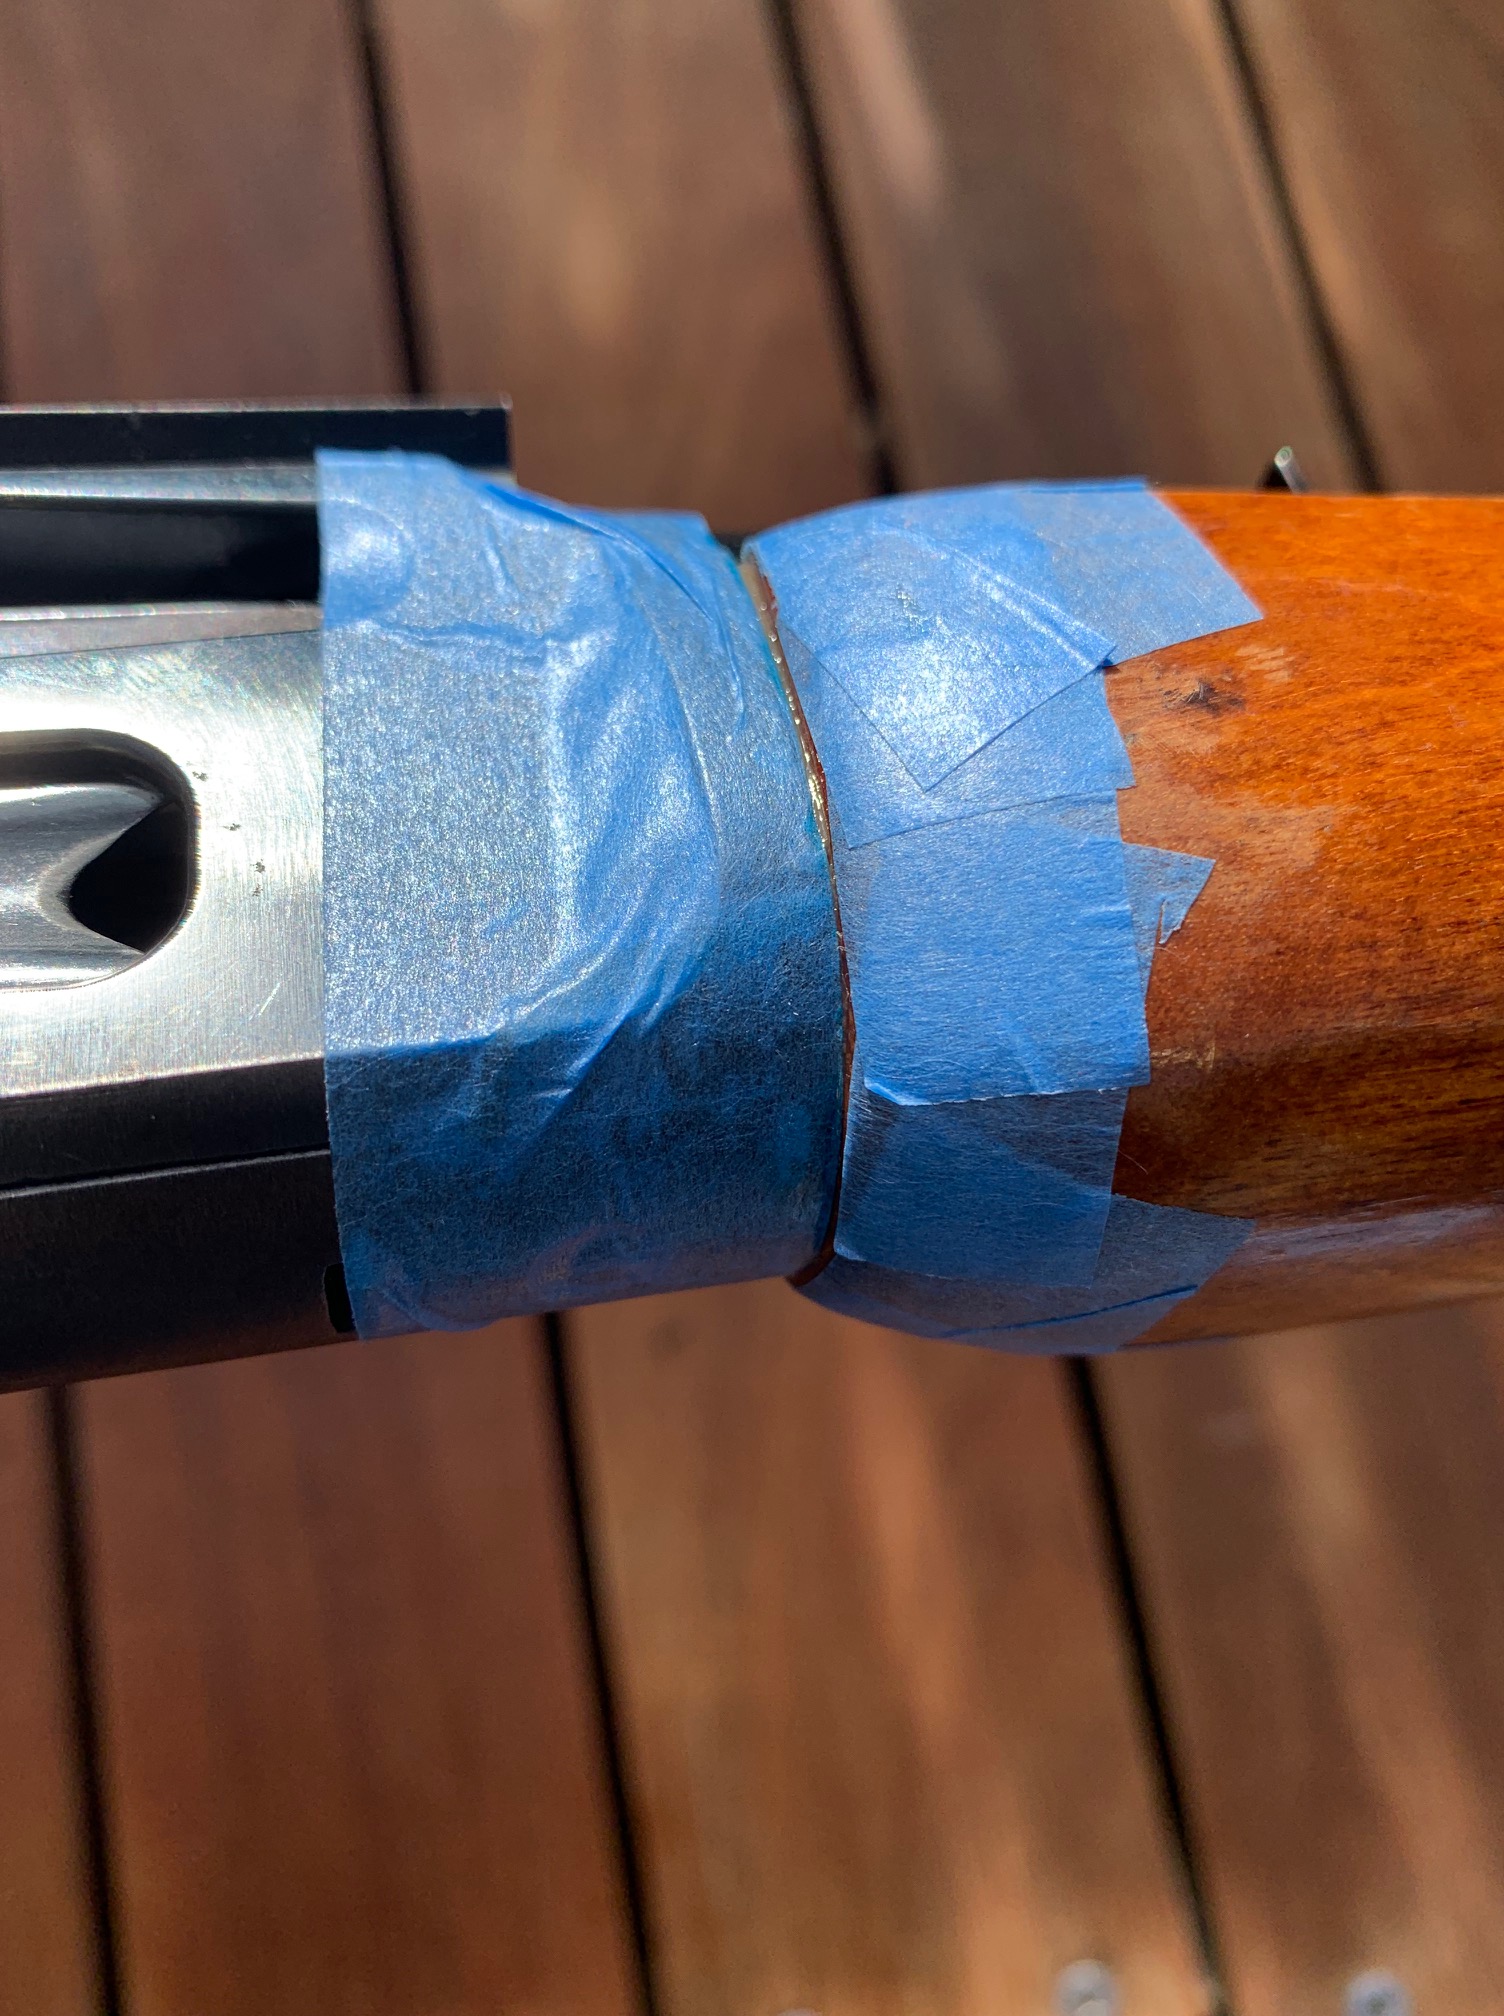
Reassemble the barreled action and trigger guard and tighten the king screw. The silicone should slightly extrude out either side of the barrel as the barrel beds down as shown:

RTV silicone should extrude out either side a little

Wait 48 hours for the silicone to dry. Carefully cut away the extruded bead slightly lower than flush to break any mechanical lock. Clean up any mess with a scalpel leaving something like this:

Cleaned up with a scalpel. We have to do the same to the top wood.

Now, do the exact same thing all over again, only this time for the top timber, above the same platform. Before reassembly, build up a few layers of masking tape between the forend and top wood on the flats (where the two timber meet). The idea being, that once dried (and the tape removed), when the top and bottom wood is reassembled, the RTV should clamp down tightly around the barrel, providing support and rigidity.

PART 3: FREE FLOATING THE FOREND

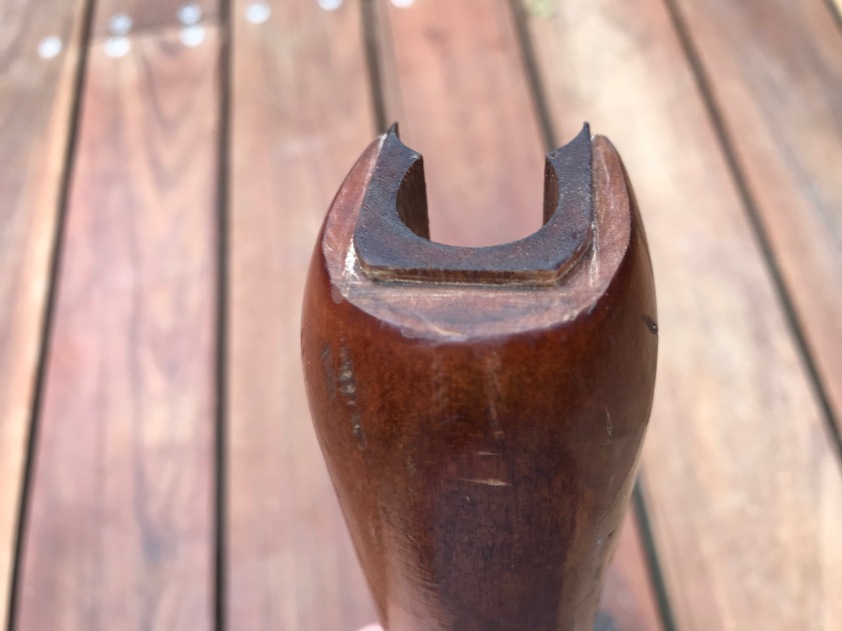
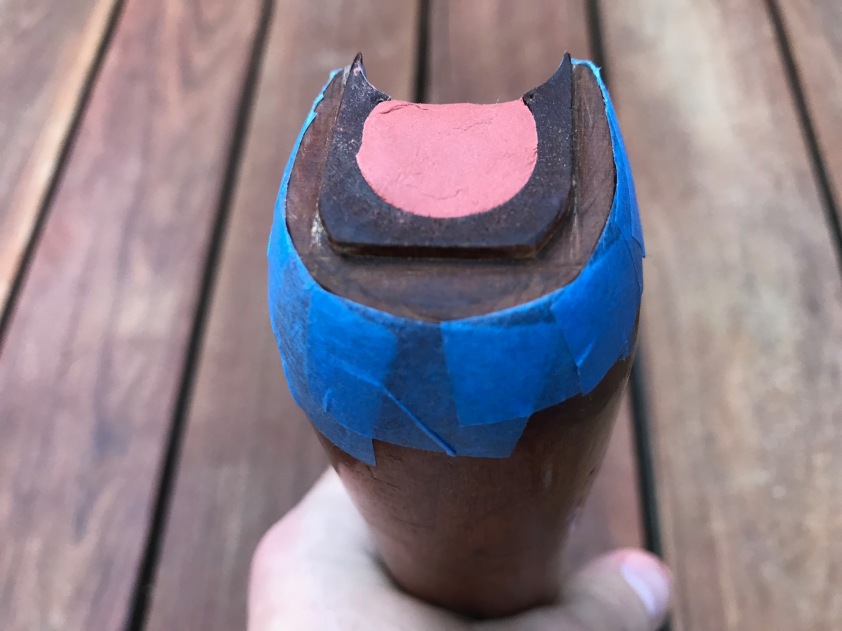
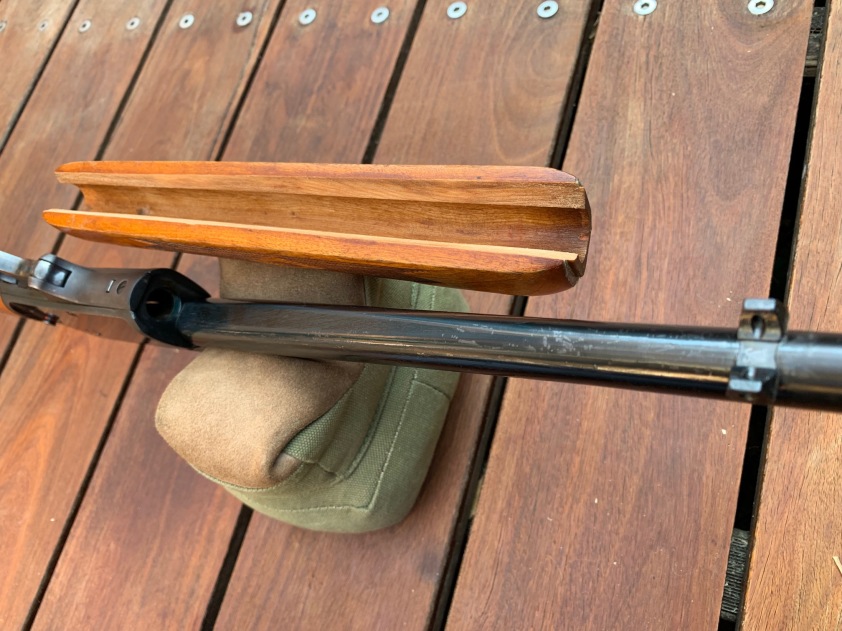
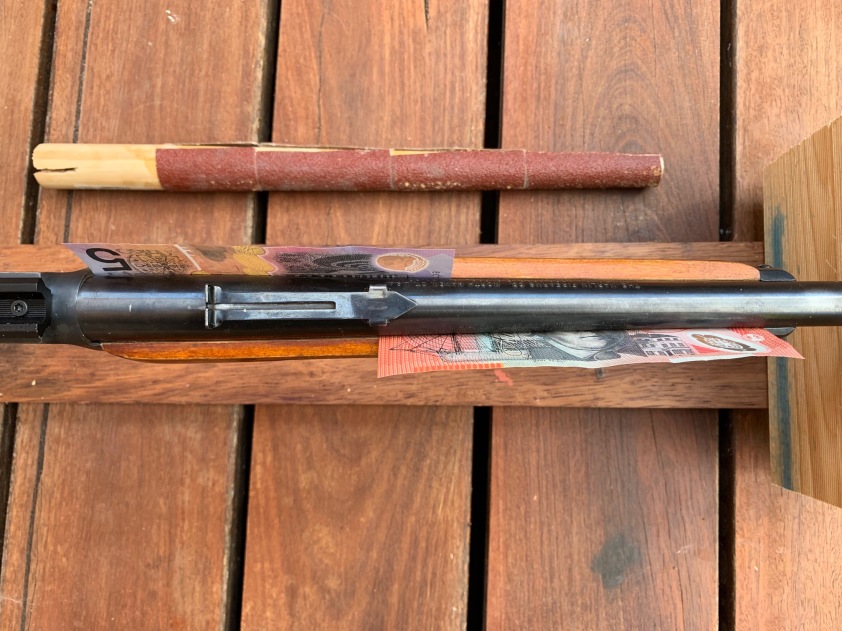
Part 3 is relatively straight forward; we just need to relieve the timber swell at the tip of the forend and along the channel such that the barrel is completely free floating past our RTV bed. A playing card should slide easily under the entire length all the way back to the RTV bed. This can be achieved by incrementally applying machinist’s blue to the underside of the barrel, but I just use matte red lipstick as a cheap and convenient alternative. Again, the Dremel can greatly speed up this step with care! Keep removing material until the barrel flex up/down/left/right a couple of millimetres once reassembled; the last thing we want is for the barrel to badly whip against the forend under recoil:

Factory timber pad at forend free-floated

PART 4: THE TRIGGER GUARD AND KING SCREW

We must analyse how the guard is interacting with the king screw and the timber forend. Of all the accurizations, the relationship between the trigger guard, king screw and the forend is possibly the most critical, warranting much investigation and experimentation. It is also common to bed the trigger guard using a small amount of epoxy. Only the front third of the plate needs doing. Nothing remarkable here.

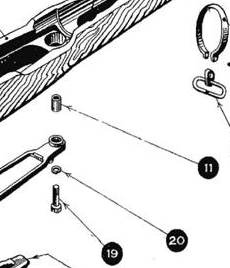
Over time the timber will dry out (without the constant application of boiled linseed oil). There’s a good chance your timber has shrunk away from the trigger guard. Therefore we must consider the king screw length, the king screw washer and the king screw bushing length. The three parts in question are shown in the following diagram:
sub.jpg

11) king screw bushing 19) king screw 20) king screw washer

A good trick for measuring depths with and without these components is to unscrew the king screw and count the turns until the thread makes its first “jump”; resulting in an audible click. It was around 6 turns for me, depending on the presence of the washer and bushing.

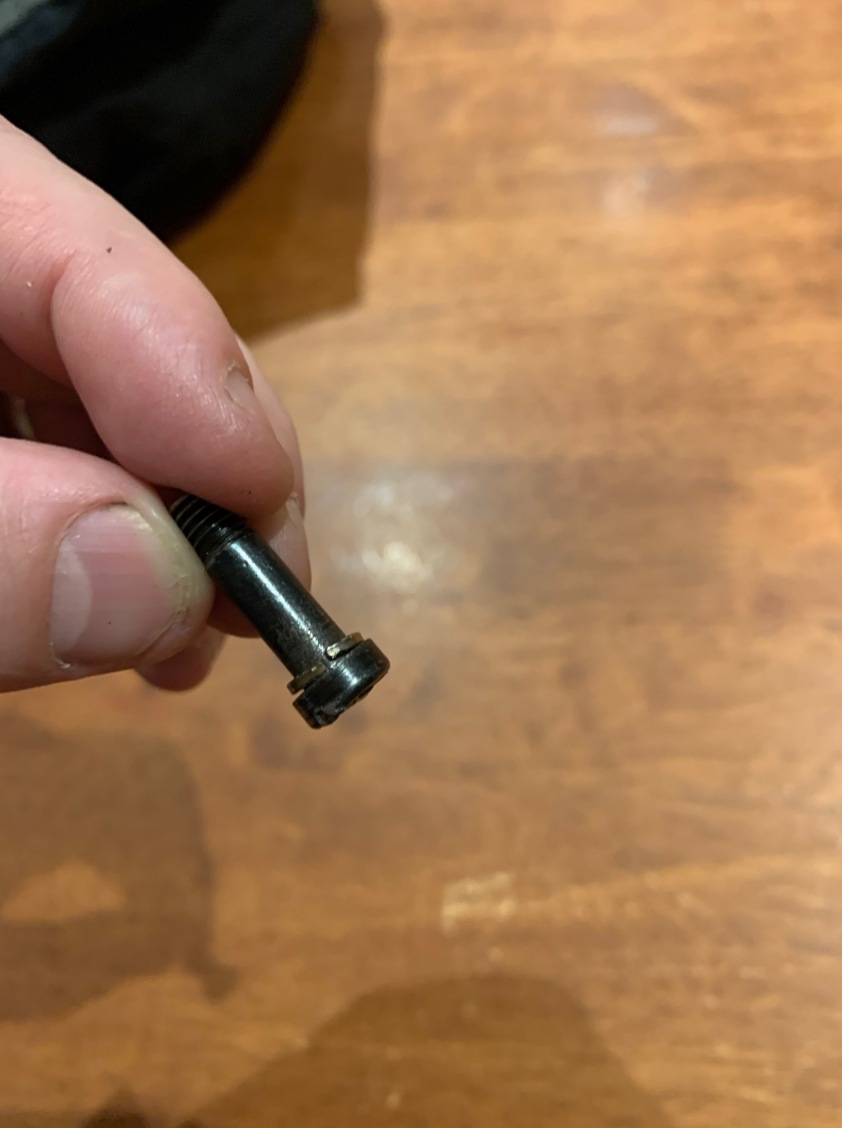
The king screw should never bottom out in its hole; the king screw washer usually prevents this (20).
washer

Make sure a washer is present to prevent the king screw from bottoming out in its hole.

The king screw bushing should not tightly bind between the trigger guard and the action (as was the case with my rifle). This can happen with shrunken wood.

The main screw bushing must be present, but not tightly binding with the timber forend in place

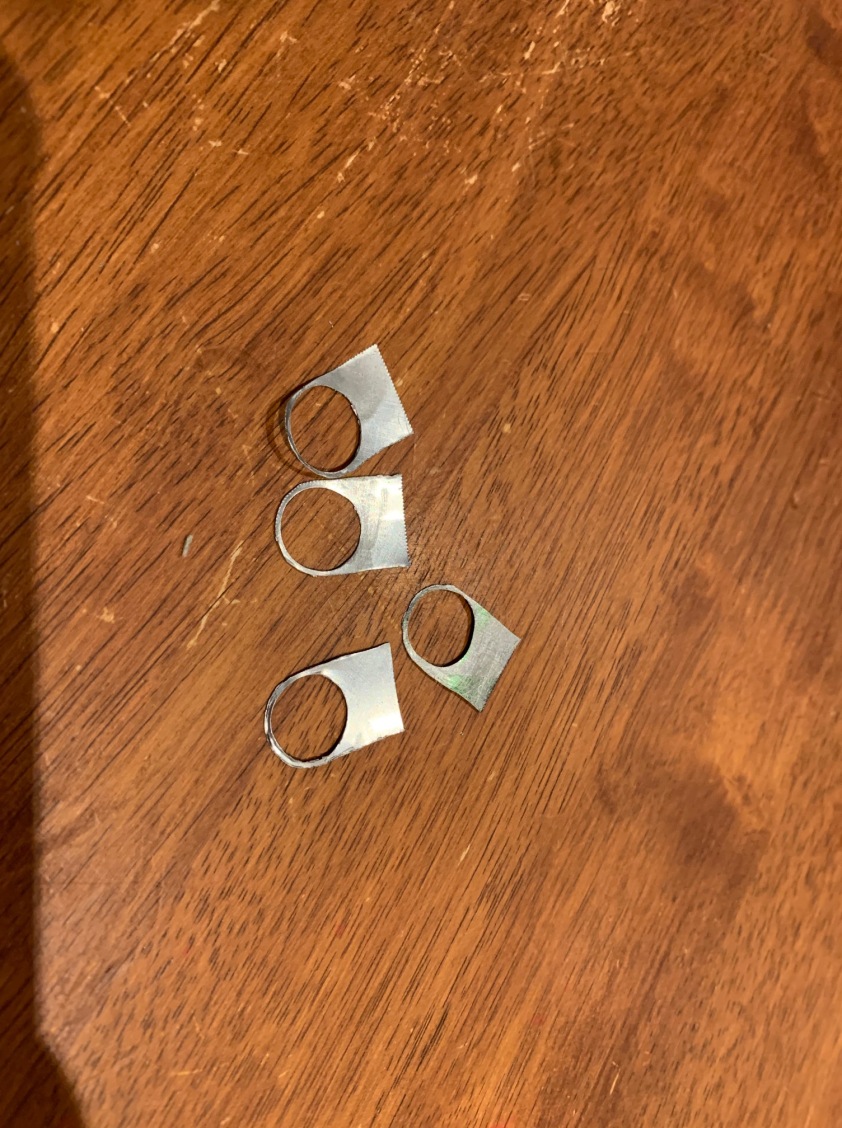
Shim the trigger guard until the king screw bushing is not binding, resulting on the clamping force instead being uniformly distributed onto the timber (via the shim). This was actually a technique used on the L42 sniper, and be done at home be aluminium can as I did:
shims

Mine took four pop-can shims to prevent the bushing from binding. A single, thicker, steel shim would is even better.
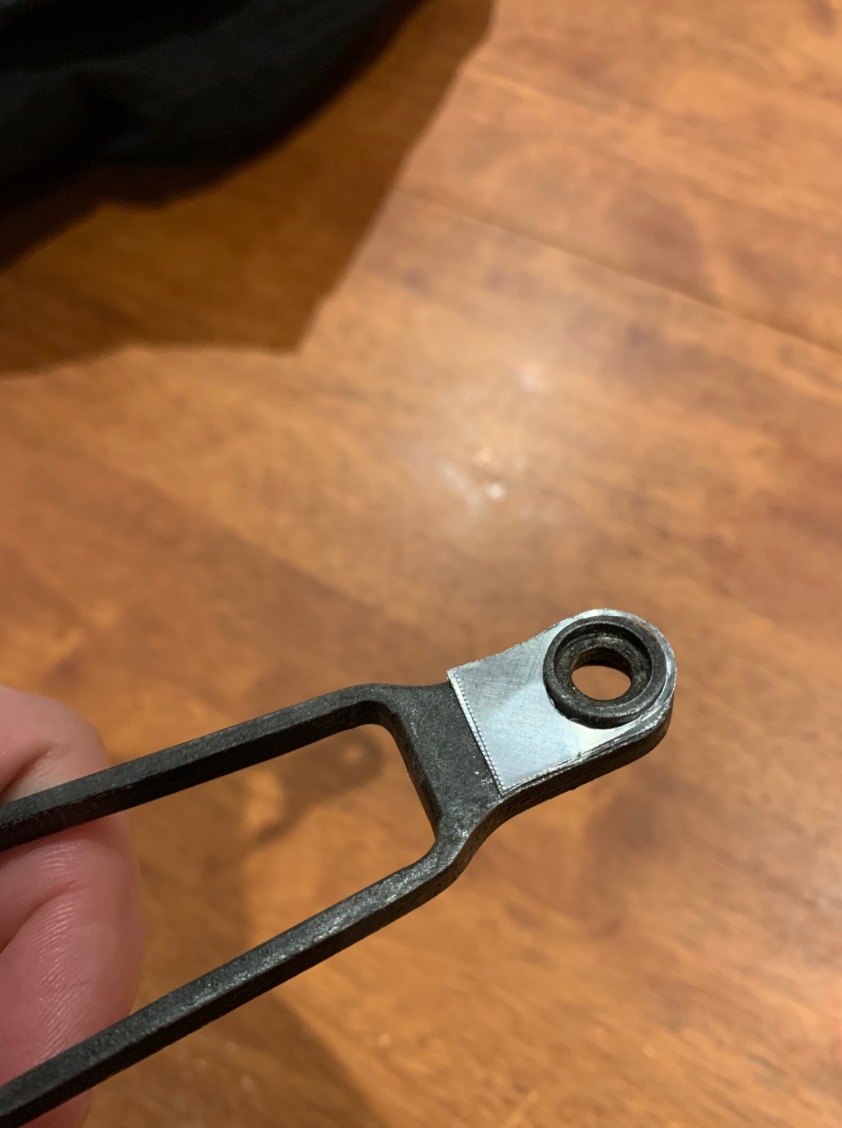
shims2

Before cutting, trace the pop can with the guard for a precise fit

CONCLUSION

A quick visit to the local range yielded an encouraging result. Here’s 10 x 174gr SMKs over a full case of AR2209 (H4350), shot in under 2 minutes, with sling tension and a bag under my stabilizing hand. I used the factory front blade sight with an original No4 Mk1 micrometer sight, so shooter error is likely:

RTV Bedding The Factory Lever

The purpose of this article is to give an entry-level guide to some of the (easier) alterations you can make to improve a lever action rifle’s inherent accuracy. In truth there’s virtually an endless list of improvements the tinkerer can make. Nonetheless the return on effort somewhat diminishes following the more significant modifications. I’ll therefore focus on these fundamental (and essentially simpler) improvements. Most of my information for this article comes from the rather famous, yet sadly out of print book “Accurizing The Factory Rifle – M. L. McPherson.” And to quote Paco Kelly’s Leverguns:

“Gaining accuracy in a leveraction rifle is really not much different than doing it in a bolt action. The principles are the same. There is no mystery, it is just that most folks take if for granted that 3 to 5 inches at 100 yards is normal and you have to live with it. That is utter nonsense….first of all on today’s market there is not one brand of lever action, one style, or one make that won’t generally shoot into less than 2 inches with the right ammo. Some few individual guns (lemons) may go into larger groups…but bolt actions have the same problems with the unusual stinker in a group.”

The Problem with Bedding

As the barrel and action heat and/or any timber warps, most factory lever action rifles exhibit a wandering point of impact (poi). I’ve had accurate lever action rifles which were profoundly accurate, but only for those opening cold-bore shots. After that, the poi rather dramatically moved as the rifle heated up, usually downward vertically. This is what is often referred to as “vertical stringing”, and is really common for levers.

IMG_8404

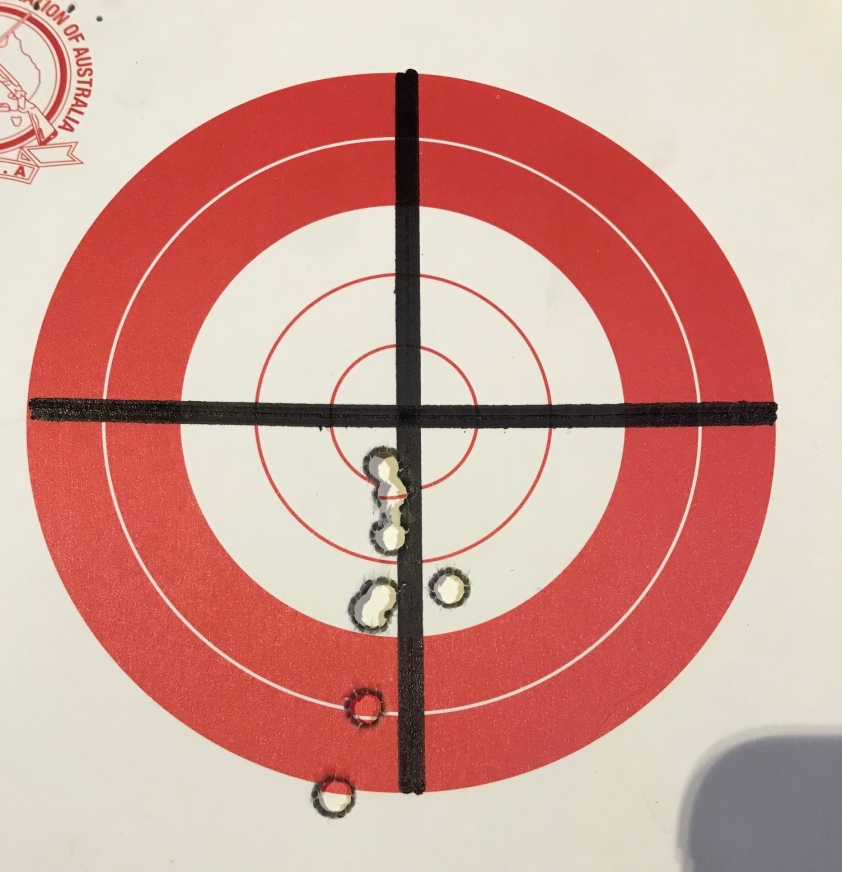
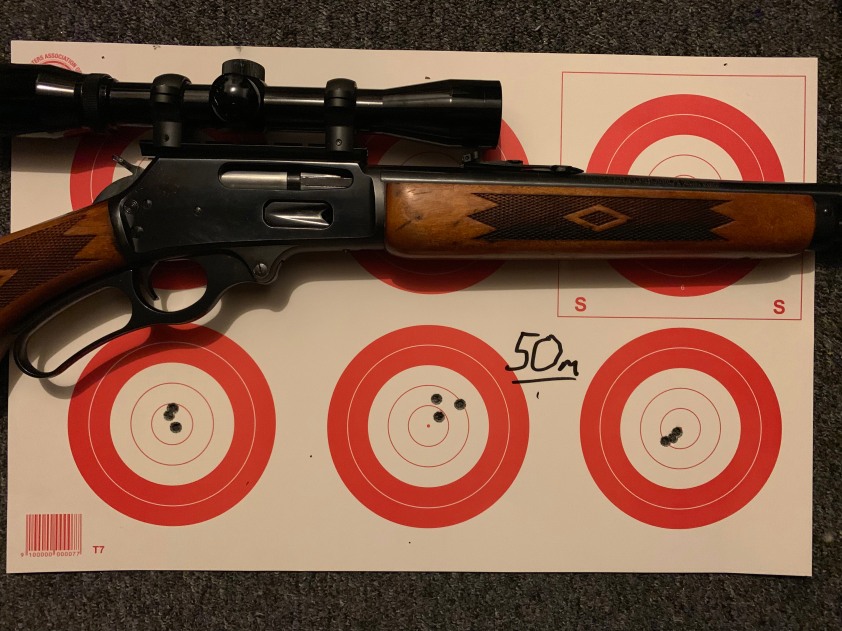
Typical 50m group showing “vertical stringing”. From cold, the group starts tight, but inevitably wanders after repeated shots. 21grs AR2207/H4198 under a 150gr (~1900fps).

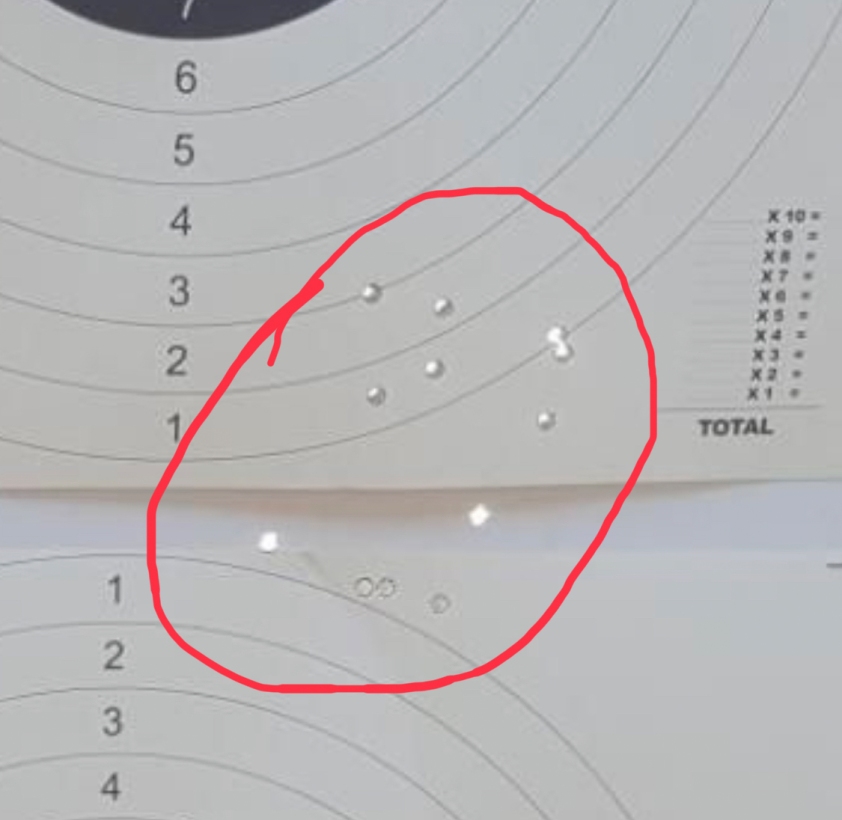
I’ve had other lever guns that also seemed to cluster nicely, but then seemed to throw a “flyer”, often more laterally than vertically. I’ll label this “lateral stringing”. Both are symptomatic of different bedding issues.

lateral.jpg

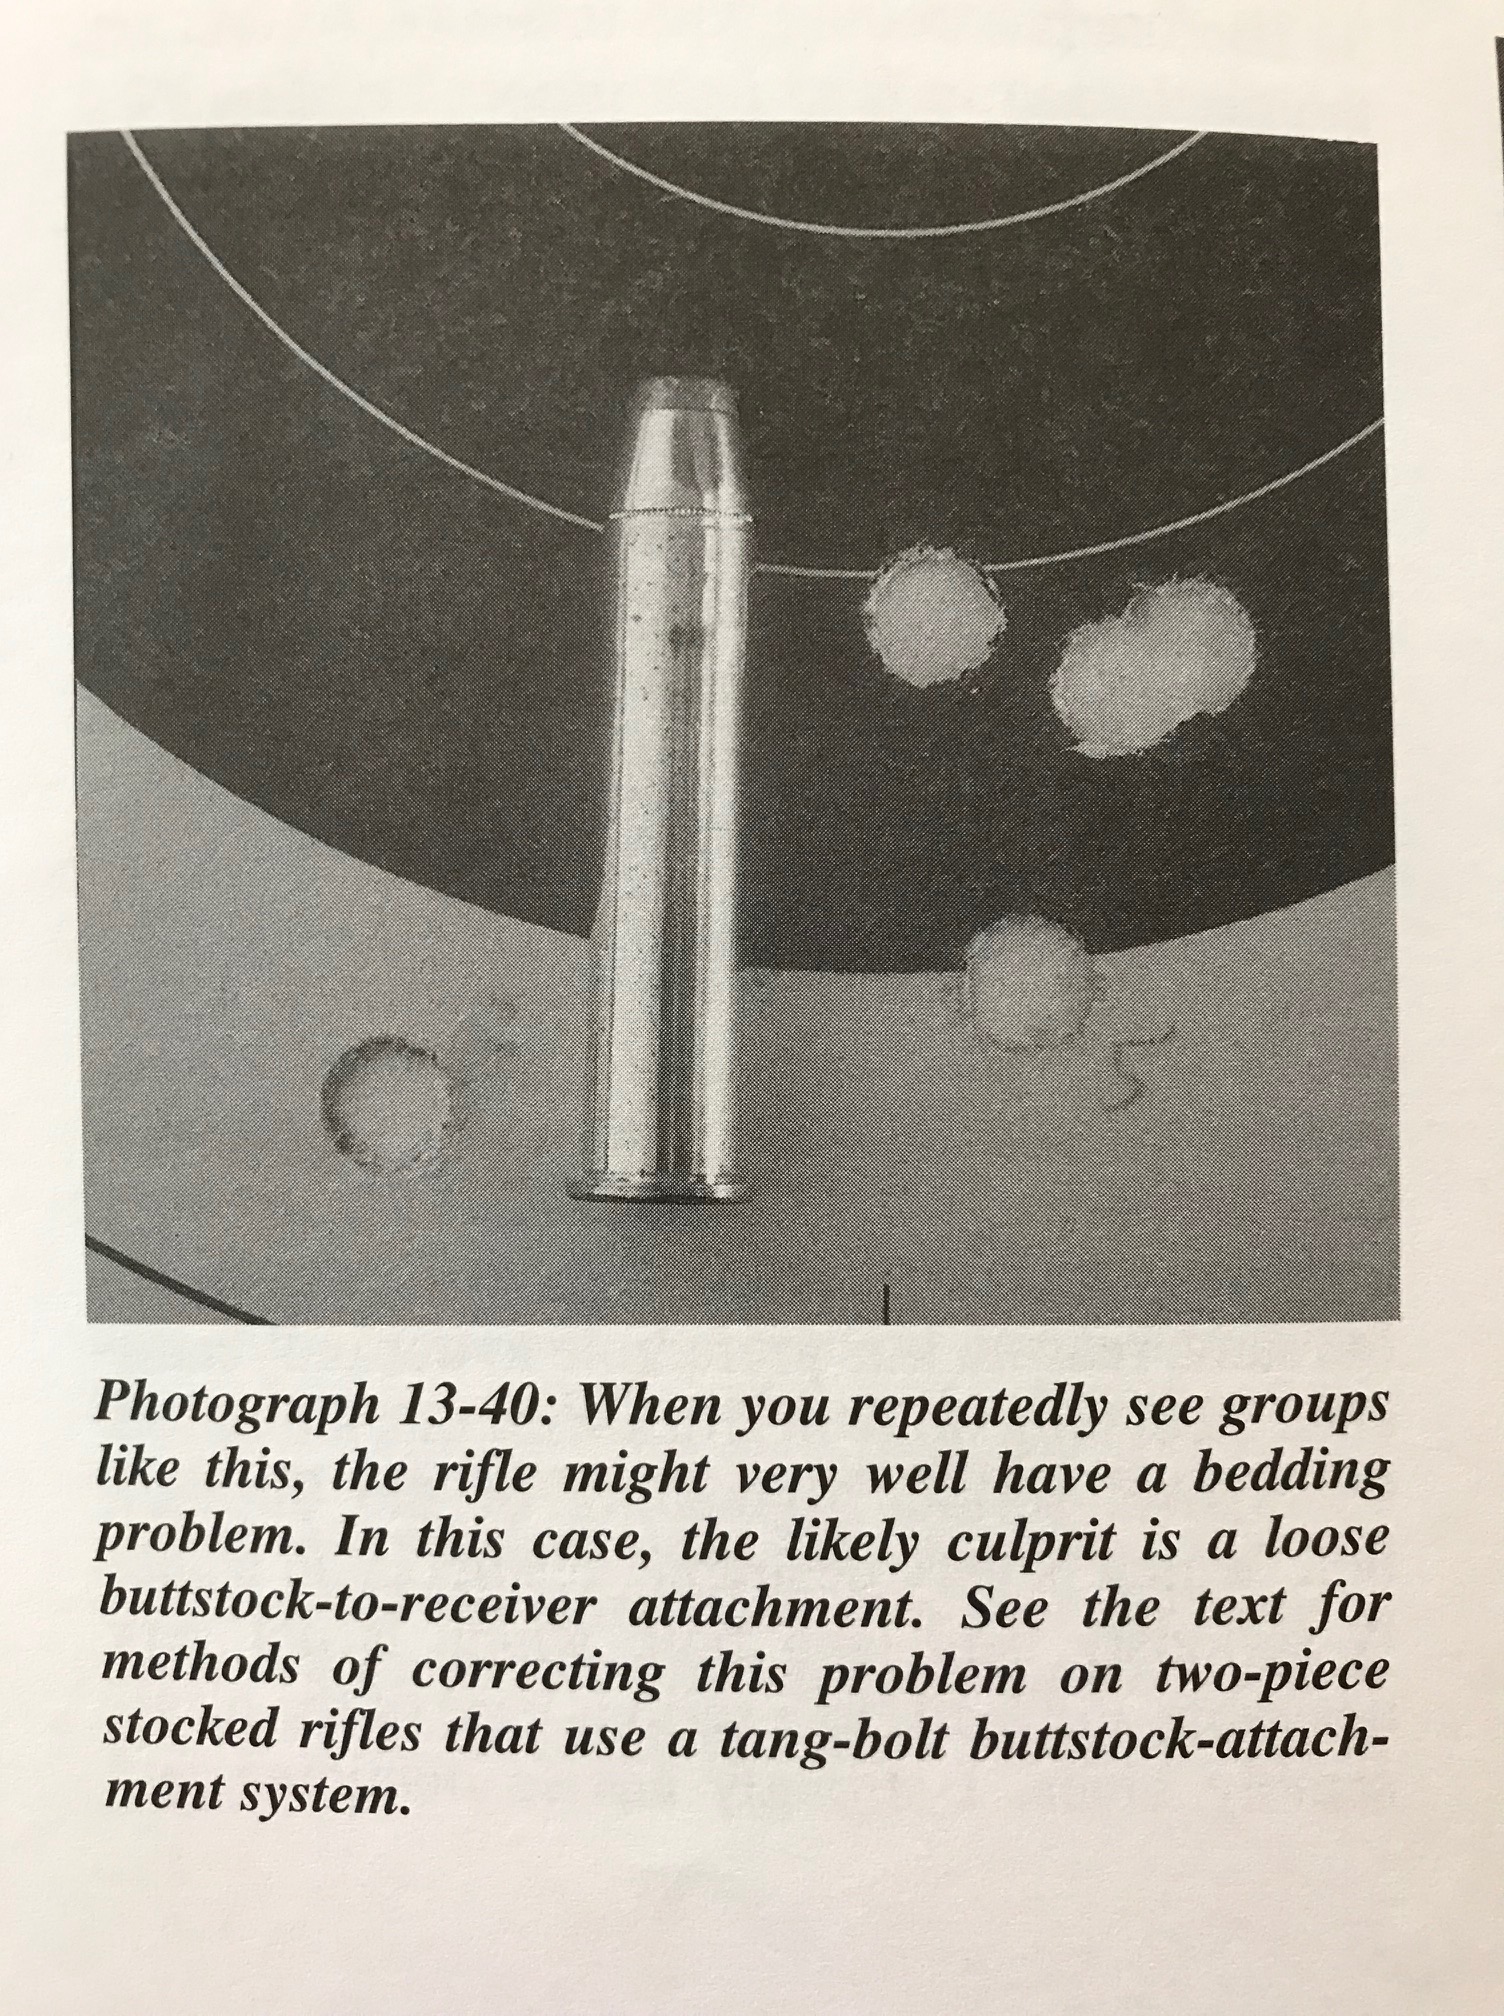
Extract from Accurizing The Factory Rifle – M. L. McPherson

Vertical stringing usually stems from forend stresses. “Flyers” may well indicate buttstock-to-receiver bedding issues.

Using your favourite load, a valuable test is to obtain a good sense of how your gun behaves (as the barrel and action heats). Then, completely remove your forend and carry out the same test to see how your groups change. This can be a little tricky, but is achievable by balancing the receiver on a rest. With a bit of luck, your poi will be noticeably more stable with the forend removed; then you know your issues are coming from the forend. If not, then it’s reasonable to presume your issues are more likely to reside in the buttstock.

Part 1: Forend Bedding

To quote M.L.McPherson “Obviously, any system that places wood (or almost any synthetic material) in direct contact with both the receiver and barrel offers the potential for the following things to induce stress between the forend and the barrel-receiver system: changes in barrel temperature, due to shooting or atmospheric temperature; variation in stock size and shape, due to changes in atmospheric humidity

A lever action rifle leaves the factory with a tightly fitted forend. As a result, as the barrel heats, the barrel has a tendency to expand and move away from the timber resulting in the aforementioned wandering poi. The wandering direction can seem odd, however remember any barrel taper will impact poi characteristics. Furthermore, wood-to-metal contact with respect to the receiver and frontal forend capture are subject to any timber warpage over time, also possibly affecting any inherent stresses on the barrel. The basic premise of accurizing the forend is to relieve these stresses.

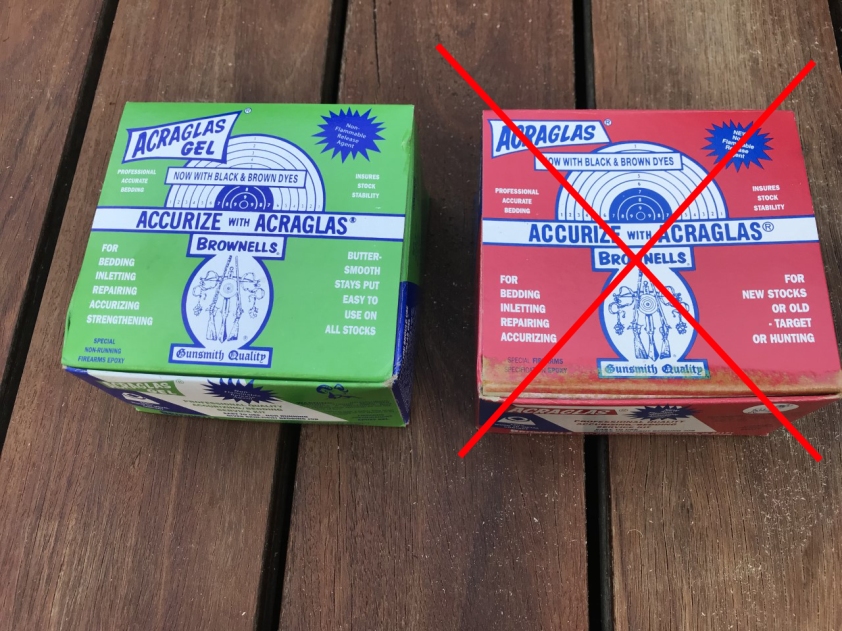
Firstly, we will remove a little material between the forend and the receiver. We will then replace this material with a gel-type epoxy bedding agent. BROWNELLS ACRAGLAS GEL® is the perfect product for this. The traditional, less viscous, BROWNELLS ACRAGLAS® can be problematic (when bedding the vertical surfaces). It is highly recommend to use a gel-style bedding agent for the following step.

gel.jpg

Use a gel-type epoxy bedding agent

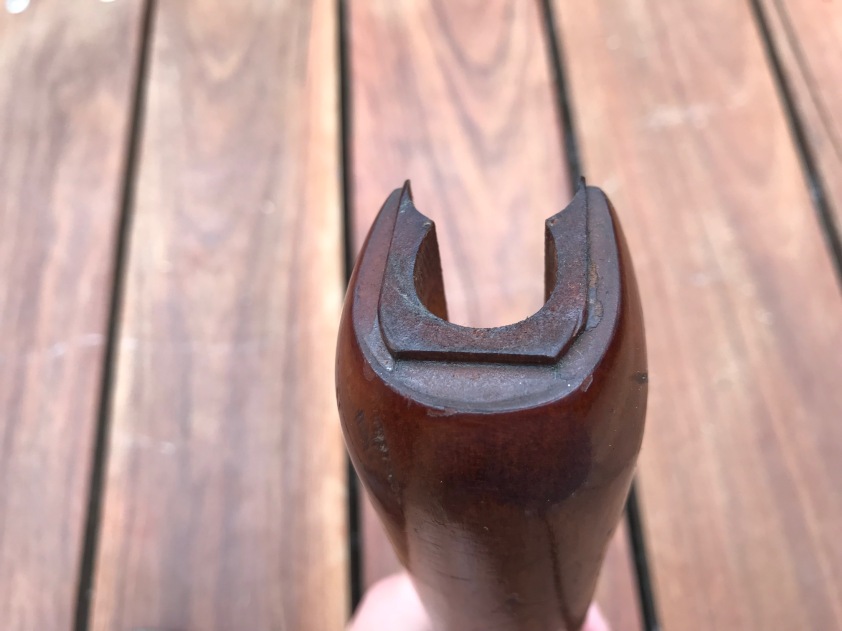
Remove the magazine tube for the entirety of Part 1. Using a fine toothed file, carefully file away a small amount of material where it keys into and makes contact with the receiver. This will be replaced by our bedding agent providing the perfect fit between the forend and receiver. After making these reliefs and reassembling, the entire forend should be able to (ever so slightly) rock back and forth.

IMG_8760.jpg

Unrelieved

IMG_8762.jpg

Relieved – just a very light sanding on the bearing surfaces. Notice I haven’t altered the upper flats as this does not make contact with the action – only the lower flat surfaces and a tiny amount on the vertical.


Ensure that the keyed portion of the forend that enters into the front of the receiver is clean. If necessary, use alcohol or carburetor cleaner to clean any oil from the wood. Ensure any excess solvent has evaporated, possibly use a portable hair dryer to heat the wood and evaporate the remaining solvent.

Apply multiple coats of release agent under the barrel in front of the receiver and to the areas of the receiver itself that might make contact with the forend. Apply quality masking tape around the outside perimeter of the receiver, and around the adjacent perimeter of the timber forend (to protect the finish). Dam the magazine feed hole in the receiver with modelling clay, mask over the top of this. Also dam the magazine channel in the forend (preventing any bedding agent from excessively flowing into the magazine channel). As a precaution I also dammed the narrow upward pointed channels either side of the barrel on the receiver. Basically, as neatly as possible, protect any timber and metal that you don’t want bedding agent to bind to. The only exposed area without tape and/or release agent should be the relieved timber that keys into the receiver.

actionPlugged.jpg

The entire keyed area should receive multiple coats of release agent.

IMG_8764.jpg

Forend ready for bedding

Mix a small batch of gel-type bedding agent. Since this material will be visible on the finished rifle, add a dab of colorant to match the hue of the forend. Remember a little bit of colour goes a long way.

IMG_8789.jpg

Go easy on the colarant – a little bit goes a long way

Apply the bedding agent to the keying portion of the forend (the relieved perimeter that you just cleaned). Be sure to get a sufficient coating to adequately cover the surfaces that extend back inside the receiverReassemble the forend (excluding the magazine tube) and nip up your screws. Wipe away the excess gel that extrudes out with a damp cloth.

coated.jpg

More gel is better – we can always remove later

IMG_8791.jpg

You want enough gel so it extrudes out like this, wipe away with a damp cloth


IMG_8793.jpg

Excess gel can simply be wiped away

Allow to dry for 24 hours with the magazine removed and barrel and receiver supported. Do not allow the rifle to rest on the forend while the epoxy hardens, the rifle should be right side up and horizontal during this process. Once the epoxy is set the forend should come apart fairly easily.

Upon disassembly, chip away any gel that has spread up onto the upper flats surrounding the magazine channel – this area is not a bearing surface and thus should be kept that way. Your forend should now be a perfect fit that should facilitate easy disassembly and reassembly. This is the foundation of the next (most crucial) step; RTV silicone bedding the barrel channel.

IMG_8844.jpg

Only the lower bearing surfaces should have the glass bed.

Again to paraphrase McPherson: I can recommend laying a bead of silicone down the barrel channel. Assuming the forend is bedded at the receiver, this RTV layer can aid in preventing resonation of vibrations between the forend and barrel. Further, it performs as a soft cushiony gasket which will not produce or allow significant stressing between the forend and the barrel as the barrel and action heat.. On two-piece stocked rifles (including tubular magazine models), black RTV (Room Temperature Vulcanizing) silicone is the magic elixir for bedding the forend to the barrel and receiver. DO NOT, I REPEAT DO NOT use a traditional acetic cure RTV silicone for this purpose. Acetic cure will rust through your barrel faster than a fat kid with a box of cupcakes. Instead look for electronics grade RTV, it’s usually acid free. Permatex make one called “ULTRA BLACK”; that’s the one I used with good success.

permatex.png

Before the application of the RTV silicone be doubly certain to apply a good thick coating of release agent to the barrel and receiver — failure to do this will almost positively guarantee that you will not be able to separate the forend from the barreled-action without destroying one or the other! This product does exactly what the name implies — it vulcanizes, bonding with tremendous tenacity and strength.

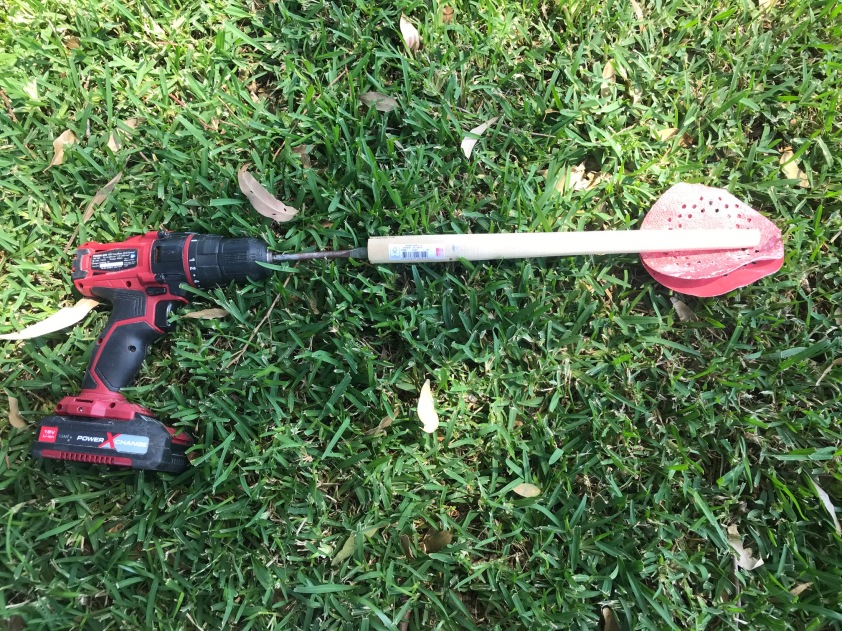
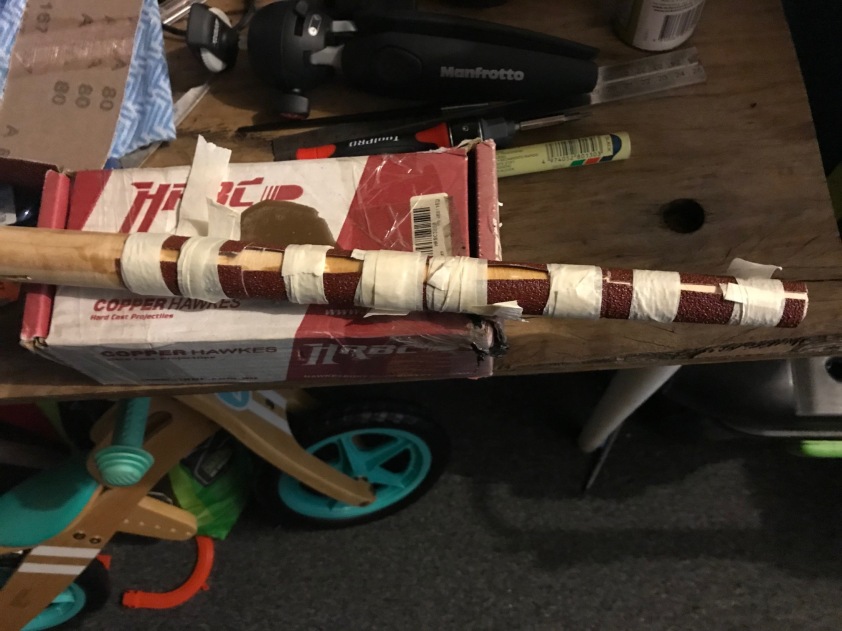
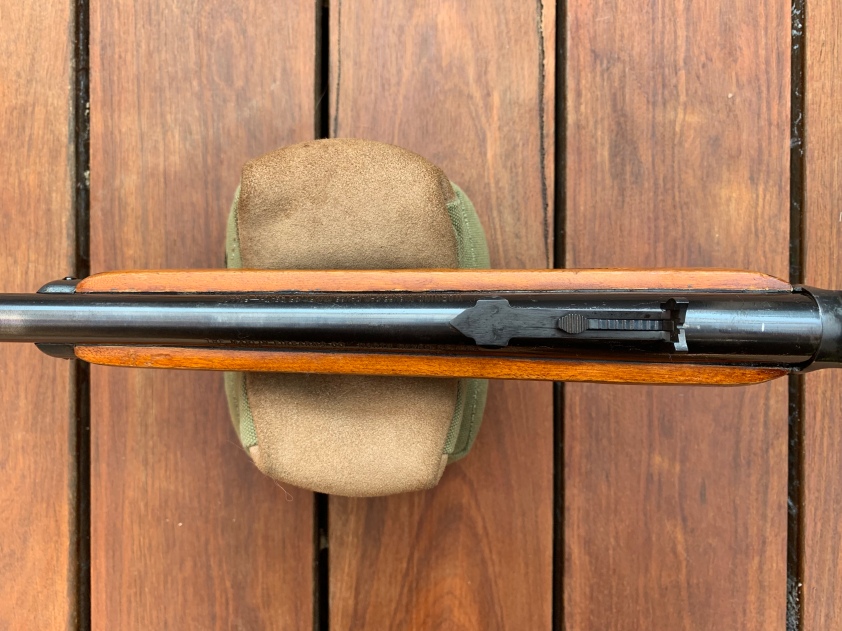
It is important to ensure that the barrel channel clears the barrel along its entire length. With a dowel that closely matches your barrel profile sand away the barrel channel until there is sufficient clearance to slip a playing a couple of sheets of paper between the forend and the barrel channel with the forend normally installed. The card should not bind at any point. I achieved this by buying some 25mm dowel that matched the diameter of the barrel at its thickest point next to the receiver. I carefully turned the dowel down using 80 grit paper (and a cordless drill!) to closely match my barrel taper. I then glued 80 grit onto this piece of tapered dowel, creating a sanding tool that near-exactly matched my barrel channel . As specified above, I then sanded out the barrel channel just enough to (after reassembly) slide a few pieces of paper under the barrel with no pinch points.

08_sanding.jpg

The poor man’s lathe!

09_sanded.jpg

Keep sanding until barrel taper is matched

10_sandedGlued.jpg

Sandpaper glued on with epoxy proved immensely strong

IMG_8875.jpg

Channel opened up, barrel coated with release agent. Ready for the RTV bedding.

IMG_8846.jpg

Sufficient clearance to slip a playing card between the forend and the barrel channel with the forend normally installed

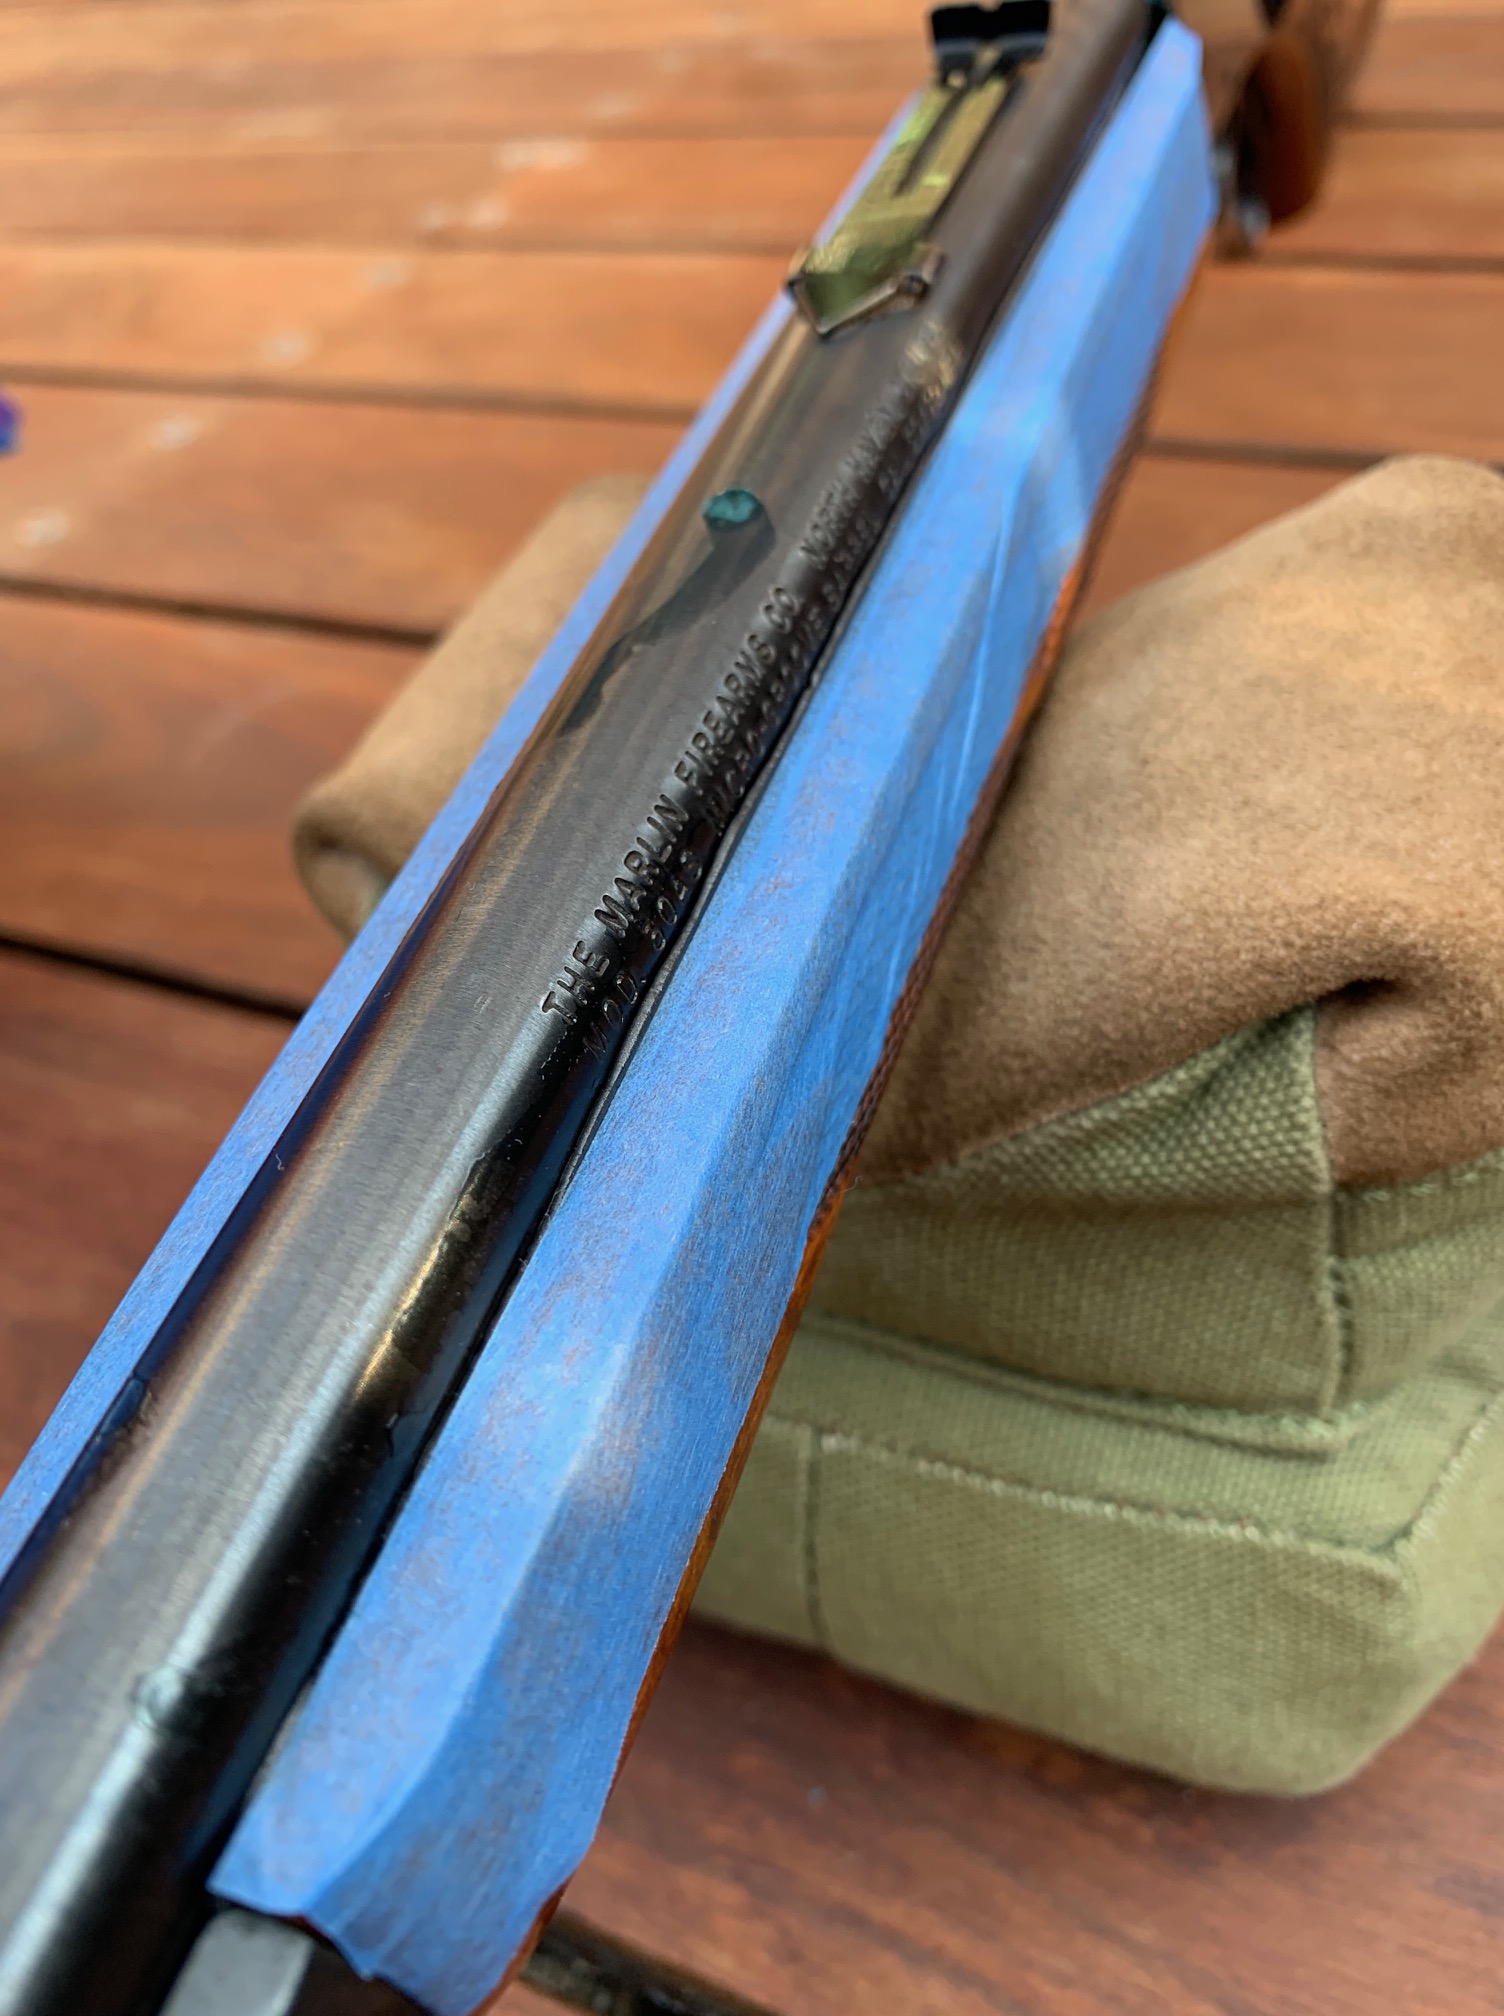
Apply a good thick coating of release agent to the barrel, especially the underside where the silicone is sure to make contact. Mask the outside areas of the forend parallel to the channel – the masking should be neat and precise as this area will  be visible. Liberally apply release agent to the front of the receiver where the silicone could possibly extrude.

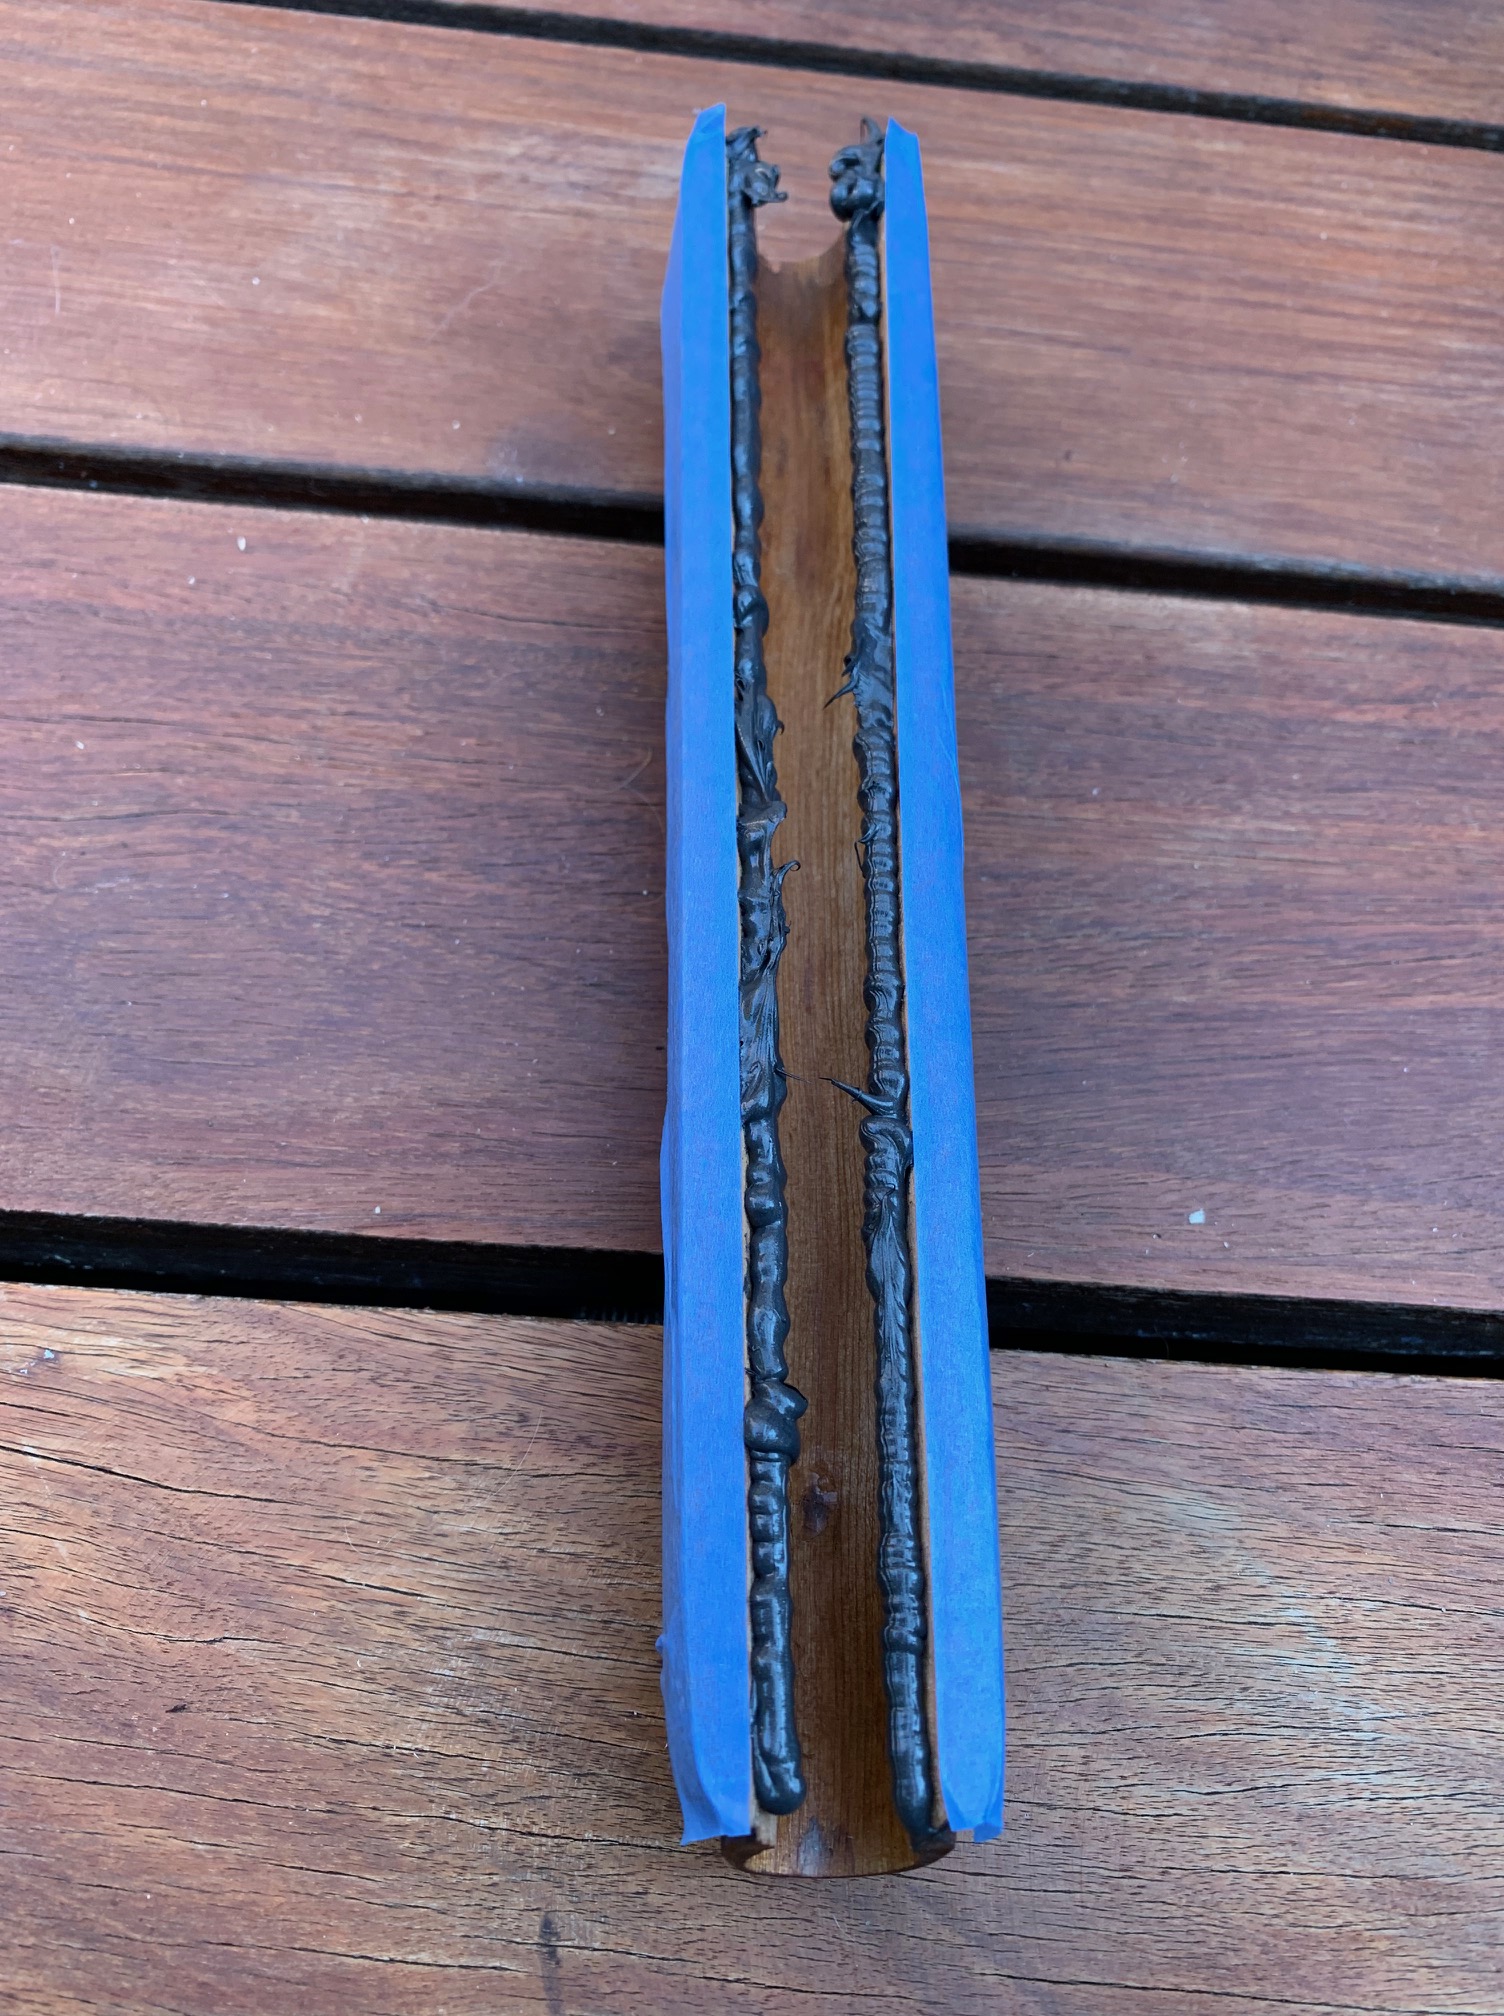
Run a large pea-sized bead of silicone down both sides of the channel (where previously sanded), enough so that a bead silicone will extrude  out either side out along the barrel upon reassembly.

IMG_8876.jpg

Better too much than too little here – we will trim away any excess silicone once green

With the magazine tube still removed, reassemble the forend and tighten up the screws. Invert the rifle and support in the horizontal position and allow the RTV sufficient time to cure to a soft rubbery consistency, about six to twelve hours. At this time the RTV is still “green”, it has not developed its full strength.

IMG_8878.jpg

A little extrusion of silicone is what we are aiming for

Use a single-edge razor blade or an X-acto knife (or similar tool) to carefully trim away the RTV that has extruded from between the forend and the receiver. If you applied release agent properly, the RTV will not stick too tenaciously to the exposed metal surfaces. You should not have any trouble cutting and peeling the extruded RTV away from the barrel and forend.

IMG_8879.jpg

For best results lay the blade at about a fifteen degree (15°) angle to the edge of the wood. The goal is to cut the RTV layer off flush at the wood side but deeper at the barrel side.

IMG_8890.jpg

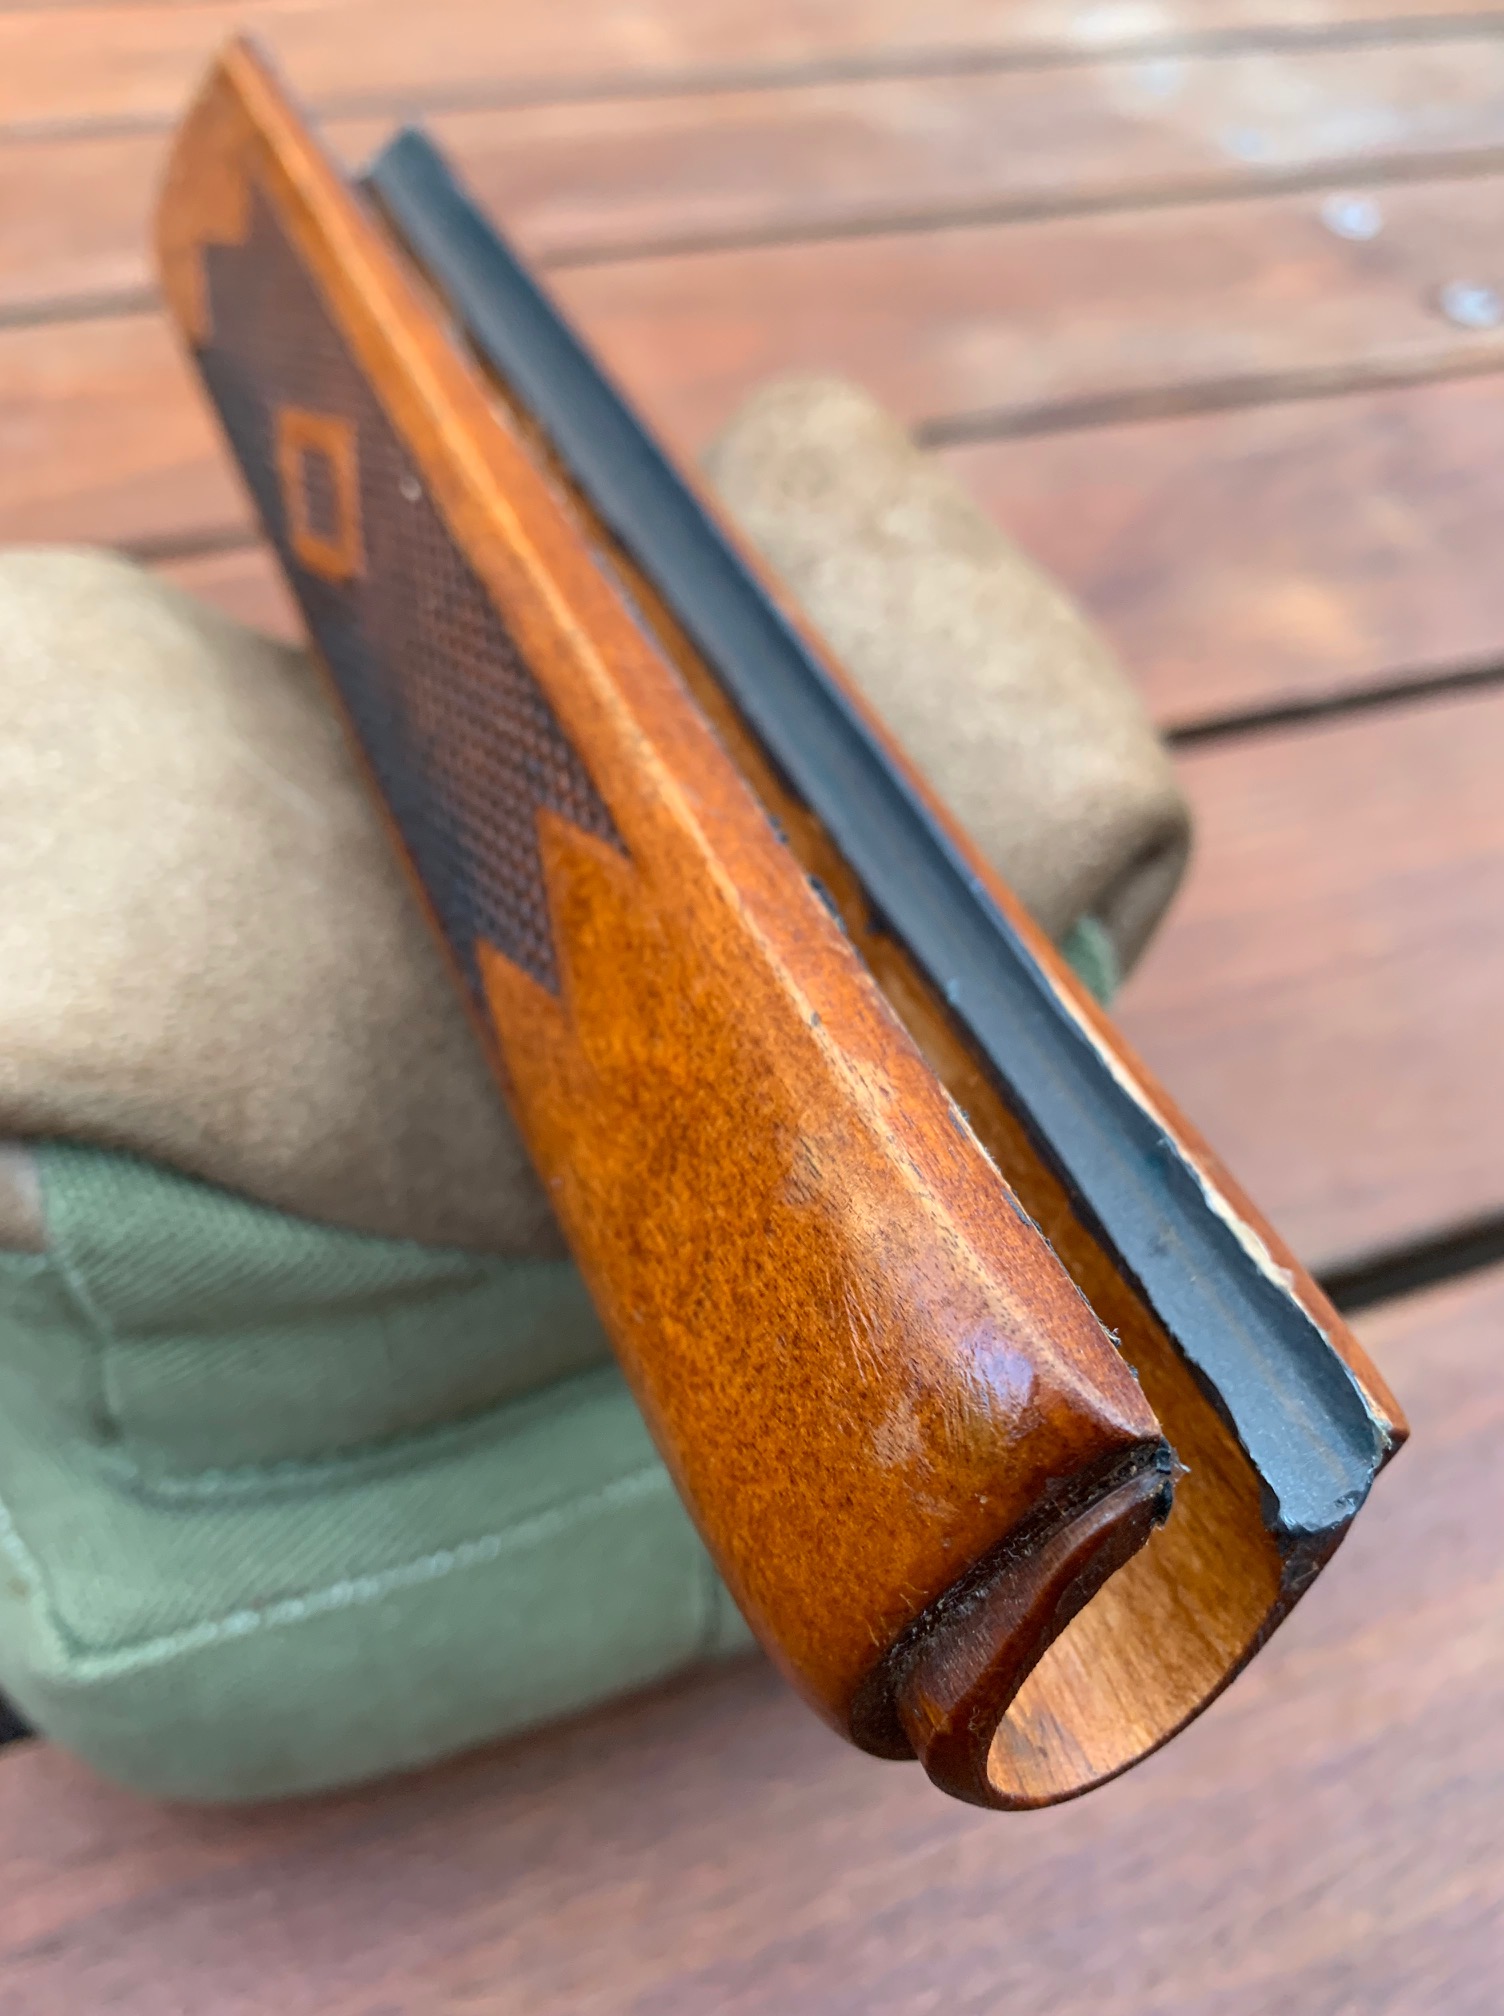
The RTV bedded channel after curing and trimming

IMG_8901.jpg

Not perfect, but pretty good. Especially on older rifles imperfections are less noticeable.

That concludes Part 1. At this point I suggest shooting some groups again to get a clear idea of how your rifle shoots. It may be sufficient to finish your alterations here (and skip Part 2 altogether). It really depends on the nature and to what degree you are chasing accuracy.

cluster2.jpg

Following the bedding procedure, here are 9 shots in a row WITHOUT pausing between targets. 21grs AR2207/H4198 under a 150gr (~1900fps). No more vertical stringing.

IMG_8897.jpg

The above work was carried out on JM era Marlin 30AS manufactured in 1996

200mGroup.jpg

Hastily shot with an old x4 Nikko scope, here’s a 200m, 12-shot group. A bit over 4″ is pretty outstanding for a hot lever gun!


A Marlin XLR 336 Review

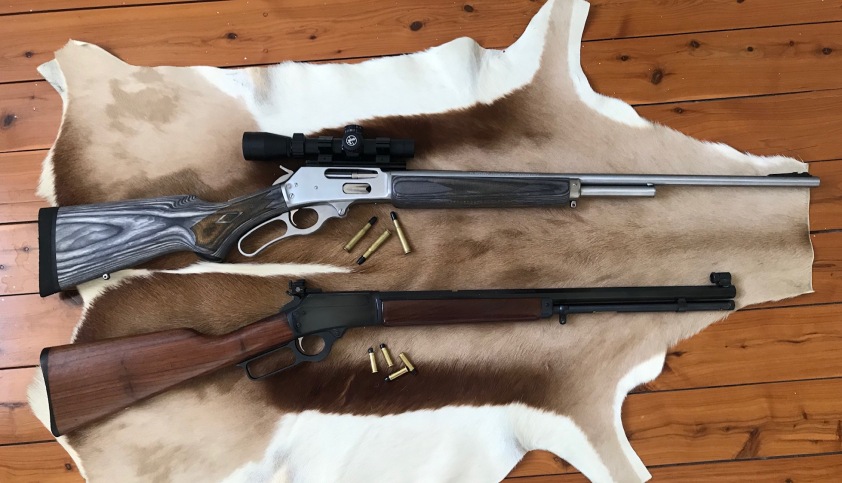
Marlin XLR 336 vs Marlin 1894CB

Marlin XLR 336 vs Connecticut era JM Marlin 1894CB

You might be wondering why one would purchase a (comparatively) expensive Marlin XLR 30-30. That’s an astute observation as similarly priced modern levers such as the Browning BLR or Henry Long Ranger in such chamberings as the 308w should always outperform ye olde 30-30. Nevertheless, there’s a few reasons for choosing an upgraded 30-30 over the modern Winchester 88 spin-offs:

  • Both the modern BLR and Henry LR sport inherently heavy triggers. Based upon the front-locking, Winchester 88 rack-and-pinion design, the trigger linkage on these actions are complex and heavy. Sure they can be lightened, but this demands a visit to a gunsmith. Even then, results can be varied, as they are generally considered to be a more complex trigger to SAFELY lighten. The 336 trigger on the other hand is simpler, and can easily facilitate aftermarket triggers. If the trigger break is important to you (like it is for me), the 336 action is a better choice.
  • A longer 24″ lever gun is a hard thing to come by these days. In many cases one is forced into the (expensive) resale market. And both the BLR and Henry LR are currently only available as 20″ carbines. This is fine if you only intend on scoping, but if iron-sights are your jam, you’ll appreciate the longer sight radius of a 24″ barrel. And of course I should mention that unlike your average Winchester 94, Marlins eject sideways and come pre-drilled and tapped to easily take a rail.
  • Whilst the 308w is a superior round, the 30-30 (shooting modern projectiles) is in reality not so far behind. Driven at 2300fps+ (which can be achieved with the longer 24″ barrel) it’s wind-bucking ability is not to be scoffed at. From a capable marksman shooting the Hornady Flex-Tip projectiles (with the higher g1 ballistic coefficient of 0.33), the XLR can comfortably 5-shot group into 6″ at 300m.
  • The XLR’s slower 1:12 ballard-style cut-rifling really does seem to stabilise (specifically) the Hornady Flex-Tip projectiles exceptionally well, in fact better than any 30-30 I’ve ever seen.  And (arguably) the ballard rifling should stabilise cast lead bullets better than the modern 1:10 microgroove barrels (which you will find in most 336’s). And cast-lead pills through ballard-rifle lever guns is highly documented. These days there’s more information online about the subject than you can poke a stick at. If you want to sling cheap cast-lead pills, the XLR will be better suited than the BLR or Henry LR.
  • And with regard to “silly-wet” target shooting, I’d like to mention that often Lever Action Silhouette rules stipulate rifles must be traditionally styled with the under-barrel magazines. The BLR and Henry LR will not conform to such requirements.

Ok, so with such reasoning out of the way, onward with the review!

NOTE: As a previous owner of an entry-level 336, the following review focuses more on a comparison between a cheaper 336 and the upgraded XLR336.

These days the Marlin XLR comes out of the same factories as the “cheap” remlin versions, so I was a little nervous it wouldn’t be much of a step up from my cheaper 336w (yet costing around double the price!). Thankfully, the first thing I noticed was that compared to the entry level 336, the fit and finish is of an obviously higher standard. The machining is a bit more refined than the 336w; less sharp edges and the action is fairly smooth out of the box, yet still locks up tight. The tolerances are noticeably tighter; some of my rough old handloads are a squeeze to chamber; I’ll need to tweak my trims and OALs to suit this rifle. From a weight and balance perspective, the XLR feels very similar to my old 336w, with little more weight up front. The factory trigger is also significantly lighter and crisper than your average 336, breaking cleanly at around 3.5lbs. Probably about perfect for a hunting rifle. Unfortunately the factory trigger still suffered from the dreaded marlin flop. NOTE: I replaced my factory trigger with the drop in “Wild West Guns: Trigger Happy Kit” trigger, as this gun will be used for target shooting – after all I do like my aftermarket triggers!

forend

The 5-shot magazine captured by a forend cap and dovetailed hanger instead of barrel bands helps with accuracy

finish

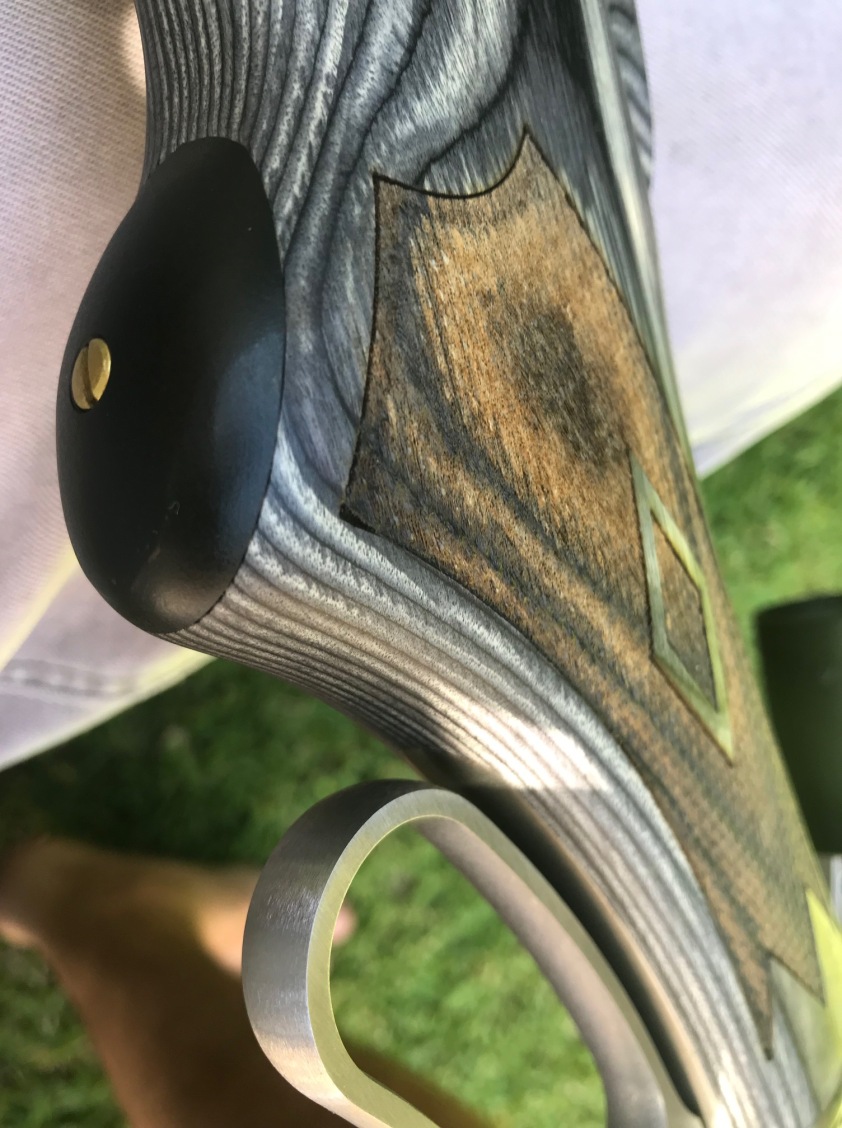
Timber finish is the best I’ve seen on a new-era Marlin

The squishy Pachmayr, recoil absorbing butt plate is finished perfectly, and does a superb job at soaking up any felt recoil from even the hottest of factory loads. It’s on-par, if not better than the aftermarket Limbsaver pad I had to add to my 336w:

recoilpad

Recoil pad finished perfectly

Even though it’s a laminated timber stock, the colouring and checkering is well finished. A small polymer cap underneath the grip I discovered is also a nice touch and oozes quality:

grip

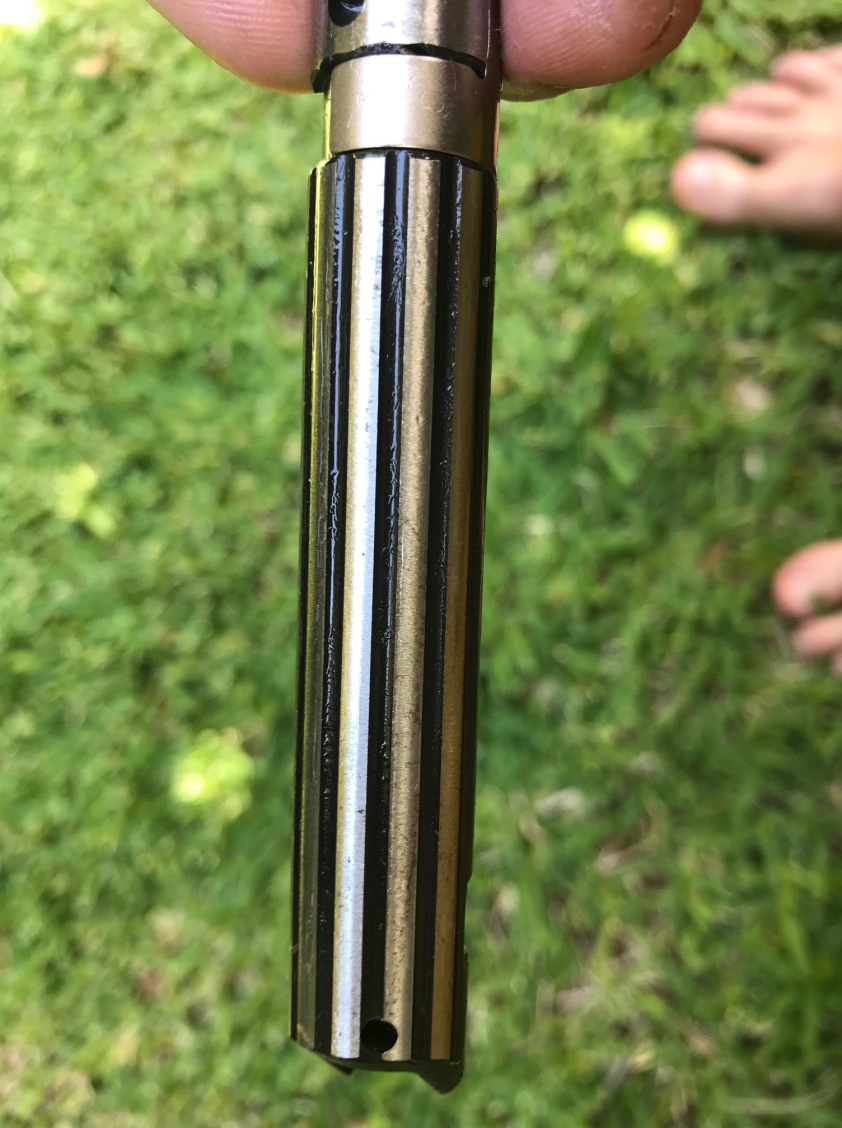
The bolt is fluted, reducing the bearing surfaces and thus helping with an overall smoother action:

flutedbolt

Fluted bolt reduces bearing surface

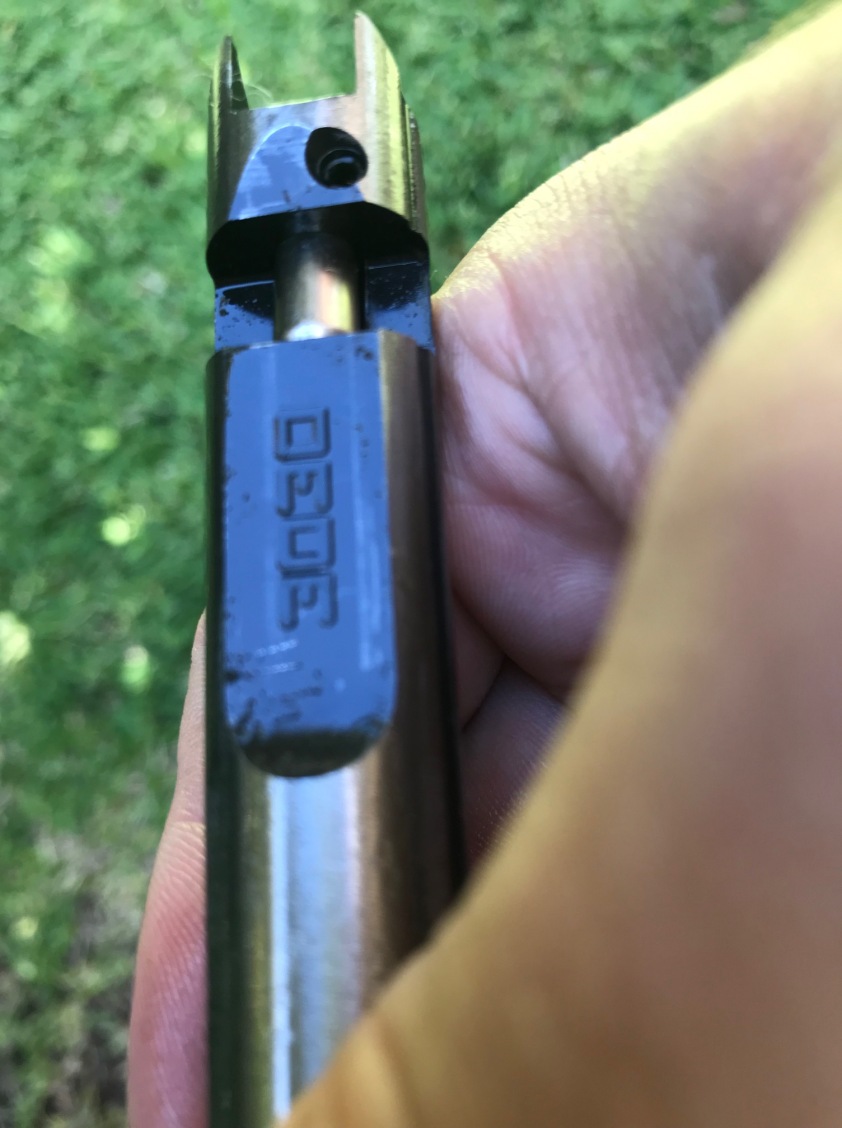
The underside of the bolt showed an embossed “3030” insignia, another touch of quality:

emboss

Another touch of quality

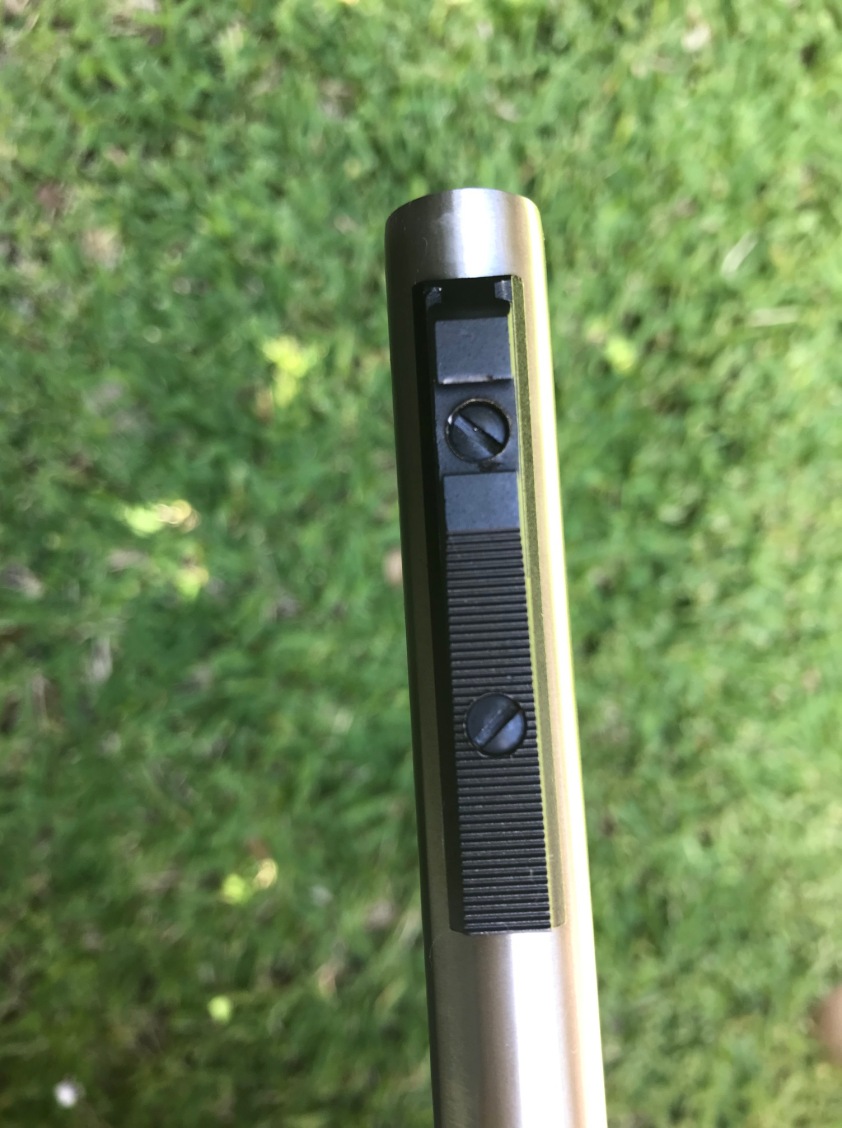
The screw-attached front ramp that is dovetailed to take the front sight has two screws (instead of just the one as you see on the budget 336 models) meaning I was comfortable changing the front sight without worrying about damaging any screws. This was a real bug-bear for me in the past when changing front sights:

frontsight

Two screws for the front sight much sturdier

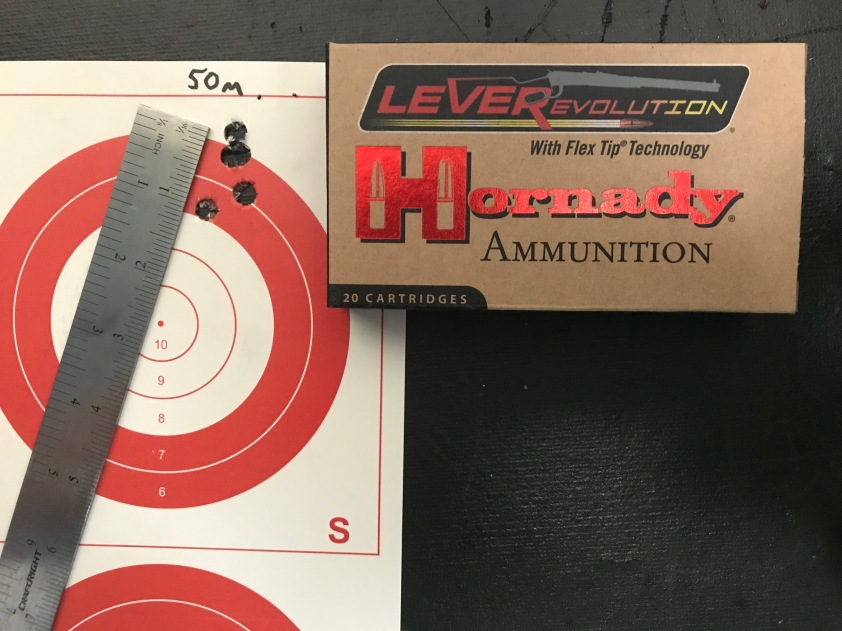
With a box of Hornady Leverevolution factory ammo, the XLR 5-shot grouped very tidily indeed. Sporting a little 1-4×24 scope at 50m, the first three shots stacked sub-moa on top of each other, then the fourth and fifth opened up to just under 2moa. This is undoubtedly due to the barrel properties changing from the heat generated by the hot hunting loads (after all, it’s no free floating barrel!):

leverevolution

Hornady Leverevolution 50m group

Beyond 5-shots the gun has a strong tendency to string vertically. This is common for a lever gun due to the direct contact between the timber forend and barrel. As the barrel and action heats, the barrel has a tendency to expand and move away from the timber, thus resulting in a vertical wandering point of impact. The wandering direction can seem counter-intuitive, however remember that any barrel taper can impact such characteristics. In fact this problem can be mitigated through a bit of home tinkering by RTV silicone-bedding the forend, but that’s a subject for another day!

Working up handloads, 21 grains of AR2207 under a 150gr plated bullet with a muzzle velocity of around 1800fps groups south of 2moa, encroaching on the 1moa mark:

50m group, Berry’s 150gr copper plated bullet

And 25 grains of AR2206H also with a muzzle velocity of ~1800fps  also groups consistently into around 2moa, even with a piping-hot barrel, which has real potential as a longer-range target load.

50m group, Berry’s 150gr copper plated bullet

Interestingly my XLR didn’t seem to like the milder Trail Boss or AP70N loads, the rifle actually displayed quite a lot of vertical stringing down the lower end. Nonetheless AR2207 seems like the forerunner when it comes to powder choice , and certainly shoots above average for the 336.

Overall I was encouraged by the quality of the Marlin XLR 336; the attention to detail is where the XLR far surpasses your average 336. And it’s fair to conclude that the XLR is up there amongst the most accurate out-of-the-box lever action rifles. But at $900USD+ MSRP, you’d bloody hope so!!

Eating Wild Rabbit In Australia

Rabbit_SIO_DA2356.jpg

In my eyes, there are a few disease considerations when deciding whether to eat a harvested wild rabbit in Australia:

  1. Rabbit Calicivirus Disease (RCD)
  2. Myxoma Virus (Myxomatosis)
  3. Tularemia
  4. Intestinal worms
  5. Worms/Parasites under the skin

So let’s break these down individually:
Rabbit Calicivirus Disease (RCD)

RCD was considered a potentially new biological control for wild rabbits in Australia and New Zealand in the early 1990s. RCD was taken into quarantine at the CSIRO Australian Animal Health Laboratory in Geelong for comprehensive testing over three years from June 1991. During fields trials in 1995 it escaped from Wardang Island, South Australia. RCD has since spread throughout most of Australia, mainly by natural spread.

RCD infects many organs including the lungs, gut and liver of the rabbit. The latter causes acute hepatitis that can kill the rabbit within 48 hours by precipitating a rapid and widespread blood clotting mechanism. Whether RCD is effective depends on age. Rabbits less than three weeks old are not affected and only 60% of rabbits between three to six weeks old are affected. Particularly if young animals are infected and survive, they become immunised against infection when they are older. Female rabbits that are infected by the virus and survive will pass antibodies via their milk to their young, giving them protection for up to 12 weeks after birth. The take-away from these facts is that the younger the rabbit, the lower the chances are that the rabbit has contracted RCD.

Whether RCD actually affects humans was considered in great detail by the government and health authorities from the outset. A major study was conducted in which blood from 259 people exposed to RCD-infected rabbits was tested. There was no evidence of infection. International laboratories in many different countries confirm that human infection with rabbit calicivirus is not known to occur and that no ill effects have been seen, even in people working very closely with the virus.

When harvesting a rabbit, one should never eat a sick animal, as it is difficult to identify exactly what it has suffered from. There is also the slim chance that the animal could have recently contracted RCD, and it should be noted that some rabbits die very quickly from the disease and may show very few visible changes to the internal organs. Nevertheless, if an animal recently infected with RCD was killed and eaten prior to there being any signs of sickness, the virus would have no effect on humans.

Still the idea of eating an RCD ridden rabbit does not seem wise, so when it comes to butchering, it is important to closely examine every carcass to minimise the risk of even being exposed to RCD (or any other disease for the matter). When you cut open each carcass the lungs and liver may provide some clues. Livers of RCD rabbits are often pale and mottled. Lungs may look abnormal with large numbers of small red spots or blotches. The spleen is often enlarged and kidneys are often almost black. 

Myxoma Virus (aka Myxomatosis)

When harvesting a rabbit, one should never eat a sick animal, as it is difficult to identify exactly what it has suffered from.

With regard specifically to Myxomatosis, put simply, eating rabbit with myxomatosis will not hurt you.

Within two years of the virus’s official mainland release in 1950, Australia’s wool and meat production recovered from the rabbit onslaught to the tune of $68 million. This moment in time was also memorable for a public scare over the simultaneous outbreak of human encephalitis in northern Victoria. To calm public anxiety that myxomatosis might have been the cause of this deadly human brain disease, CSIRO Chairman Ian Clunies Ross and two other notable scientists, Macfarlane Burnet and Frank Fenner, injected themselves with myxoma virus. They were unaffected proving conclusively that the suggestion was without foundation.

As predicted by CSIRO’s Francis Ratcliffe and ANU’s Frank Fenner, the impact of myxomatosis gradually declined over time as both the myxoma virus and the rabbit population changed genetically. These days, in any case, the numbers of wild rabbits actually infected with myxomatosis are likely to be extremely low. 

Tularemia

When harvesting a rabbit, one should never eat a sick animal, as it is difficult to identify exactly what it has suffered from.

Tularemia is a real, documented disease. It is a bacteria that mostly infects ticks, but also can infect animals, most commonly rodents and rabbits. Most of the time it is contracted through a tick bite. However, if you clean an infected rabbit and its blood gets into a cut on your hand, you can catch it. Freezing will not kill it. Tularemia can actually live for years in you freezer. Tularemia can be killed by heat, so cooking the meat will make it safe.

Statistically speaking you only have a 1 in 100,000 chance of catching this rare disease, but for peace of mind, the best defense is to wear gloves when cleaning the rabbit and to fully cook it.

Intestinal worms

When harvesting a rabbit, one should never eat a sick animal, as it is difficult to identify exactly what it has suffered from.

Intestinal worms; they do not infect muscle tissue. If you’re intent on eating offal, just cook them well at temperatures above 72°C! 

Worms/Parasites under the skin

When harvesting a rabbit, one should never eat a sick animal, as it is difficult to identify exactly what it has suffered from.

With regard to worms and parasite in the flesh and under the skin, it is entirely possible that a rabbit could be infected with worms and/or parasite under their skin. They do not pose a great threat to people for two reasons; first, you generally can see these crawling out of the meat. If there are worms crawling out of my rabbit I’m not eating it. Second, worms are killed by heat. If you cook the rabbit until it is 72°C+ degrees, all the worms (and anything else) will be dead… 

If in doubt, stew it!

Reloading the Marlin 336 in .30-30 Winchester; Coated Cast Lead vs Jacketed

Courtesy of Wikipedia, a .30-30 cartridge (center) between 5.56×45mm NATO (left), and 7.62×51mm NATO (right)

I knee-jerk purchased the Marlin 336 (in .30-30 Winchester) mainly due to it’s extremely competitive price tag. The fact that it was a lever gun was also intriguing to me. Lever guns were something I had little experience with, so the whole lever action concept was a field that I was yet to explore. As it turns out, Marlin produce some of the best value “no frills” lever-action hunting rifles on the market and the 336 ended up being a great entry into the world of lever guns.

I had done a little homework and I concluded the 30-30 was a hard-hitting caliber that could cater for all of my needs. The 30-30 (metric 7.62x51mmR) was the US’s first small-bore cartridge designed for smokeless powder. It first appeared around 1895. It’s age means there is a lot of handloading data available.  Physically, the 30-30 cartridge is comparable in length and caliber to the 7.62x51mm NATO (aka a .308). In saying that, it performs vastly differently to your average 308. Let’s deviate for a moment to compare the 30-30 against the 308.

One thing I learnt pretty quickly was that generally speaking, lever guns require FN (flat-nose) or FP (flat-point) projectiles. This is due to the nature of the tubular magazine running underneath the barrel. Rounds are inserted one-behind-the-other, meaning the tip of each bullet is pressed against the primer of the bullet in front of it. If you were to use pointy SP (spire-point) bullets in a tubular magazine, the recoil from the rifle can cause the rounds to butt against each other, causing detonation in the magazine. See the problem there?!

Being limited to FN bullets means you won’t achieve the long-distance performance comparable to a 308 (which is designed to, and generally uses, SP projectiles combined with longer, heavier barrels). In more complex terms, the ballistic coefficient and flight characteristics for a 308 projectile is generally far superior to that of a 30-30 projectile. Given this fact, lever-guns are designed as lighter, close-range, hard-hitting, rapid-action carbines. Focus is placed on shooter ergonomics rather than long range performance. Basically, the 30-30 cartridge is ideal for a light, easy-handling rifle that allows for a lot of energy to be delivered to close-range targets in a quick succession of shots.

What choose lead?

There’s no denying, cast-lead is comparatively cheap. We’re talking in the realms of 1/5th (or less) of the price of commercial semi-jacketed projectiles, and even cheaper if you cast yourself. And at shorter ranges, they’re also as accurate, if not more accurate than modern factory ammo. So you might ask, why would you even consider factory semi-jacketed? Besides the obvious convenience factor, hotter jacketed loads excel when it comes to trajectory, stopping-power, longer-range performance and minimizing barrel fouling. Basically, they are simpler and easier to use. The drawbacks of such loads are they generate a lot more heat. Fast hunting loads heat a light sporter barrel very quickly,  meaning stringing long groups of shots together will result in poor accuracy. These upper-limit loads are also much harder on your barrel and your shoulder, so if you intend on doing any amounts of target practice, ideally you should stick to softer plinking loads.

Ok so back on to lead; gas-check-less (checkless) cast-lead is perfect for varminting and plinking (at close ranges), but is really not appropriate for classic, medium to large 30-30 game (like deer). The reduced charge lead loads lack stopping power, and have a much more arced trajectory, meaning you need to make significant sight adjustments / holdovers in the field to account for that excessive bullet drop. On the contrary, hot factory ammo has a much longer point-blank range. Making intensive holdover calculations whilst hunting (when you often have a short window of time to take a shot) is something you should try to avoid.

Beveled "checkless" projectiles vs two gas-checked projectiles ( right ).

Five beveled “checkless” lead projectiles next to two gas-checked lead projectiles ( right ).

Due to its soft, malleable nature, raw lead also has a tendency to leave a nice smearing of lead deposit down your barrel after repeated shots. This will quickly foul things up, resulting in progressively decreasing accuracy. Not to mention it’s tedious to clean after a comparatively small number of shots. Generally speaking, the faster you push a lead projectile, the more leading you’ll get. One obvious suppressant is to use some sort of lubricant on the projectiles, but this can be time-consuming. Thankfully, these days there’s an easier alternative: introducing the polymer/powder “coated” lead projectile.
The idea of polymer coating is to provide integrated lubrication to protect from leading. This acts to seal and lubricate the naked lead (removing the need to secondarily lubricate the projectiles). The coating restricts the amount of lead that rubs off as the round moves down the barrel. A lot of companies claim their “coated” projectiles can be pushed in excess of 2000fps without excess fouling – this may be true, but you’d definitely need to include gas checks at those sorts of velocities. Without gas checks, it’s to stick to lower velocity lead load/single-action data to maintain consistent bullet obturation. A good rule of thumb is around the 1600fps mark for checkless lead, give or take.

I noticed a lot of people throwing around the idea of “hard-cast” lead projectiles. “Hard-cast” (vs raw lead) is usually a mixed alloy that allows for a harder material. Brinell hardness for “hard-cast” projectiles is usually in excess of 15 BH, which is notably harder than raw lead ( which comes in around 8 BH ). A harder alloy (in theory) means less leading and thus potentially higher velocities ( without excessive fouling ). In our case however, without gas-checks, brinell hardness is still not really a huge factor. Sure, a harder projectile may result in less fouling, but without gas checks, even “hard-cast” projectiles can’t be pushed at anywhere near jacketed velocities.

To reiterate, if you push any kind of checkless lead too hard, and gas will “cut” around the sides of the projectile upon pressurization. This will cause the projectile to “rattle” down the barrel, tumble through the air, and keyhole (hit sideways) all over the target. When I first tried shooting lead, I used too much powder for the soft lead. This resulted in extremely poor accuracy, i.e. the rounds weren’t stabilizing. If you’re having trouble with accuracy, look for signs of keyholing, i.e. non-circular holes.

A target showing keyholing

A target showing keyholing

For Australian customers, there are a few projectile manufacturers who sell beveled, checkless, “polymer-coated” .310″ 165gn RNFP 30-30 hard-cast lead projectiles. Due to the coating, these indeed do not require lubrication (although lubing may well give you a slight improvement in accuracy), and (generally) so long as you keep your velocity below 1600fps will give you good accuracy out of a Microgroove 336. They are also bags of fun to shoot and extremely cheap to run; great for varminting or honing those off-hand plinking skills.

What powder should I use?

Down here in Australia, most use (and supply) ADI powders. ADI provides load data on their website. Don’t forget to check out the single action section when looking for reduced cast-lead loads. They also provide an equivalency chart, which shows how ADI powders compare to other (non-Australian) powders. DISCLAIMER: This load data should be roughly translatable across equivalent (non-ADI) powders, however as stated on ADI’s website, there could be up to 5% variance, so be careful. If you’re unsure, do more homework first and verify your new load from another source before reloading.

With the disclaimer out of the way, lets talk about sending lead through the Microgroove 336. Cast-lead projectiles definitely like a reduced load of a powder around the middle of the burn-rate spectrum. Both AR2207 (equivalent to H4198) and AR2206H (equivalent to H4895) are fairly accurate under lead, although AR2207 is by far the most popular of the two down under. I was able to achieve a consistent 2.0moa with a reduced load of ~16.0gns of AR2207. AR2206H  yields around 2.5moa with ~18.5gns of (over a 165gn RNFP lead projectile). These two loads will give you around 1500fps. You’d might be able to tighten these up slightly with some 1/10th gn ladder testing.

16_2207_l

AR2207 is the most popular lead powder down under. around 16.0-17.0grs is the sweet spot. This large sample size group was achieved by pan lubing the coated projectiles.

16_2207_u

Same load as above, but no lubing (just the standard coating on the commercial projectile)

30-30 lead group

This 5 shot group was in fact achieved with a peep sight; get rid of those factory dovetail sights and heavy factory trigger ASAP.

30-30 lead group

It’s a bit cheeky of me to claim that “flyer”, but the 336 tends to group pretty tightly followed by a pesky flyers as the barrel heats up. That’s why shooters tend to broadcast 3-shot groups; in reality I think you need 5-10 to claim any sort of inherent accuracy.

ADI’s/IMR’s new Trail Boss powder is also an option for lead. Trail Boss is designed to be used with lead; with an emphasise placed on economy. If you can get your hands on it, it’s at least worth a try (or the comparable Unique powder) for reduced lead loads. Trail Boss granules are physically less dense (i.e. more volume for weight) than your traditional smokeless powders, meaning the cases are a lot fuller for the equivalent charge. This (theoretically) results in a more consistent burn. You read in a lot of places a 165gn cast-lead projectile over 9.0gns of Trail Boss, but in fact my 336 groups noticeably tighter at slightly less than this, around 8.4gns seems like the sweet spot. This will give you around 1150fps. Again, I strongly recommend doing some ladder testing around this area to identify precisely what your rifle wants.

8_4

An 8 shot, cast-lead, Trail Boss group. This was shot rather quickly through a hot, dirty barrel. Realistically, this is the sort of accuracy a 336 can constantly plink, disregarding fouling and barrel heat.

8_4_out

A surprisingly tight, 200 meter group shot off a rudimentary front rest (with some pretty cheap optics). This was shot through a clean, cold barrel. Whilst the 336 won’t consistently group this tightly, it does show how (practically) capable a modern 30-30 can be (with the right load and a decent replacement trigger). Who says a lever-gun isn’t accurate?

EDIT: Apparently around 7.0gns of Unique under a 165gn cast projectiles is also accurate; quite comparable to Trail Boss. This stunning 1moa group of a cast-leads was shot by a moderator on http://www.marlinowners.com:

30-30 CAST TARGET

Hunting / Semi-jacketed Loads

Generally speaking, for semi-jacketed hunting projectiles, the modern 30-30 demands a medium-burning powder. For hunting at longer distances, you probably should choose the 150 gn for higher speeds and less drop. For closer-range brush hunting, the heavier 170gn round nose (or flat nose) are more tolerant to deflection from vegetation, not to mention harder-hitting. Both of these projectiles are more than adequate for true medium game. DISCLAIMER: Especially for your full power loads, ALWAYS ensure a proper crimp. Without it, projectiles in the magazine can seat deeper and deeper after each shot, equating to a progressively smaller ignition cavity that can ultimately result in a catastrophic detonation. 

The new 160gn Hornady FTX “Leverevolution” projectiles over 32.0gns of AR2208 (similar to H335) would be a solid start. They have a gummy spire-point and thus a higher ballistic coefficient than your traditional FN projectile, meaning a flatter trajectory and a bit more stopping power over those medium distances (200yd+). A real no-brainer, but not necessarily any more accurate than your traditional FN projectiles. Nevertheless the fancier 160gn Hornady FTX “Leverevolution” are probably best paired with HODGDON LEVEREVOLUTION POWDER. There is load data on the side of the bottle itself; 35.5C under said projectile will spit them out at 2300fps which is fast for a 30/30.

My personal favorite is a 150gn FN over 34gns of AR2206H  (aka H4895) – this will give you about 2200fps and is pretty flat even out to 200m. The 150gns (with a cold barrel) will shoot a consistent 3-shot group of around 2.5moa. Apparently 30.0gns of Bench Mark 2 (aka IMR3031) and 35gns of H335 work pretty well with the 150gn projectiles too; although please double check your manuals first for these two powders, as I’ve never personally used them. Hand-loaders swear by these combos and I’m pretty sure with some 1/10th gn ladder testing you could identify a damned-accurate hunting load that would group close to 2moa.

I’ve also experimented with 23gns of AR2207 (aka H4198) under a modern jacketed pill. It’s not the most suitable powder for jacketed (a bit fast-burning for full-power 30/30 loads), nonetheless yielded good accuracy at around 2100fps.

EDIT: Another amazing 1 moa group using a 150gn FP semi-jacketed over 35gns of H335 (similar to AR2206H), again shot by a moderator from http://www.marlinowners.com:

30-30 target

Copper Plated Bullets Loads

Berry’s copper-plated 150gr 30/30 bullets are extremely accurate over 21gns of AR2207 (aka H4198), yielding approximately 1850fps.  The only catch is they must be kept under 1900fps, and they will not expand on game. Save them for varminting or the range.

cluster.jpg

Berry’s 150gr 30/30 bullets are extremely accurate over 21gns of AR2207 (aka H4198)

Further discoveries when reloading for the 30-30

Lead shaving when seating

When seating the lead projectiles, I noticed some of the lead was being shaved-off due to the tight mouth fit. This should be avoided by using an expanding die. People suggest chamfering the mouth further, but this will only reduce the lifespan of the brass. I try to keep my chamfering to a minimum. The Lee Universal Expanding die seems to do a good job of belling the mouth slightly to allow the projectile to seat down a few millimeters (before applying your press). There are other alternatives, search “expanding die” for more info.

Hornandy “Built-In Crimper” not crimping adequately 

The Hornady 2-set die is marketed to have an in-built crimper. I found that for the 30-30, this crimper was not adequately (and consistently) crimping the mouth into the cannelure. In fact I was having to increase the crimp pressure so much, it was at times denting / buckling the shoulder of the shell when seating. The solution to this was to use a separate crimping die, I found the Lee Factory Crimp Die to be an excellent tool for achieving a nice “factory crimp”. A good crimp is essential to achieve a consistent shot start, i.e. a consistent, required build up of pressure before the projectile leaves the mouth of the brass.

Over-sized ( 0.001″ – 0.002″ larger ) projectiles in a Marlin “Microgroove” barrel

A lot of people say that the Microgroove barrel likes a slightly over-sized lead projectile (approximately 0.001″ – 0.002″ larger in diameter) to help with obturation. At this stage I cannot conclusively comment on the significance of a slightly larger projectile in a Microgroove barrel, you would really need to slug your barrel before running over-sized projectiles, something I am still yet to do. The lead projectiles I buy are marketed to be .309″ and they give me good accuracy. One thing is for certain though, when using a any powder, increasing the load will not stabilize even an over-sized lead projectile – the velocity has to be around 1400 fps to prevent gas-cutting of the soft-lead, and really suits the sharp pressure wave produced by a fast burning powder.